How to Create a Beautiful Personalized Digital Valentine
Even though it feels like Christmas was just a few weeks ago, and New Year's just happened, it's already February! And Valentine's Day is just around the corner!
I know lots of people knock Valentine's Day for being a "Hallmark" occasion, but it doesn't have to be that way. Love is really, really important for humans, so I think it deserves its own holiday.
Useful resources:
- The Best Photoshop Actions Ever
- Photoshop tutorials
- Freebies: Round-up of 100 Free Textures
- 100 Free Patterns to Boost Your Creativity
- Adobe Photoshop CS6 Classroom in a Book
If you're looking for something meaningful to give to your loved one, but you don't want to just buy a card, a stuffed bear, and some chocolates (although chocolates do tend to go a long way), you should consider showing off your artistic skills by creating this customizable digital valentine.

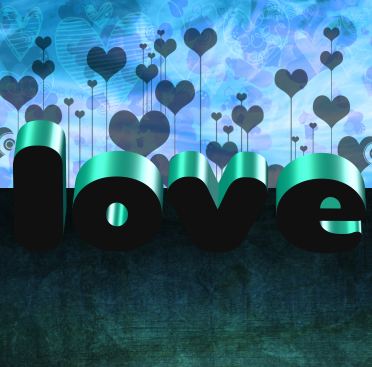
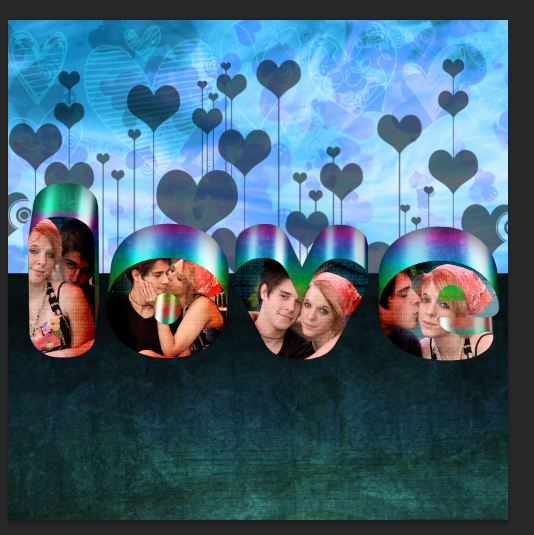
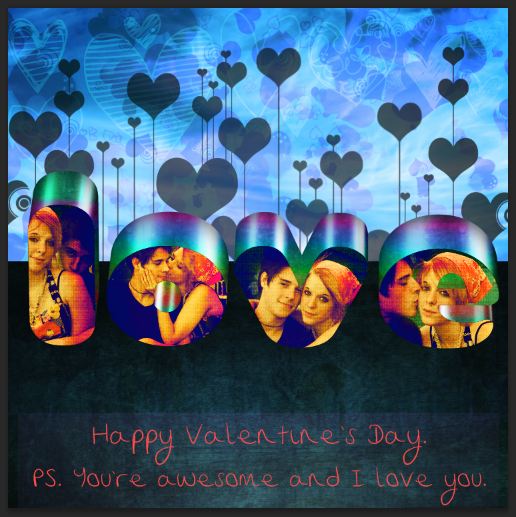
This image was created using Photoshop CS6, Xara 3D Maker 7, and a bunch of stock images, textures, brushes, and fonts that you can download for free. Although this tutorial has lots of steps, it's actually not that difficult, and the best part is that you can use your own photos to decorate the 3D text, so your gift will still be personal.
Grab some snacks and get comfortable. It's time to show your bff some love by making the most creative Valentine's Day gift of your life.
Subscribe to our newsletter and get useful tutorials and huge bundles with design freebies once in two weeks:
Section I. Creating the Background
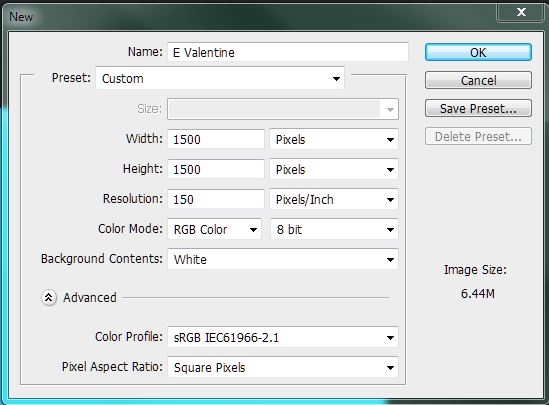
Step 1: Open Photoshop and press Ctrl+N to create a new document. Set the Width and Height to 1500 Pixels, and the Resolution to 150 Pixels/Inch.
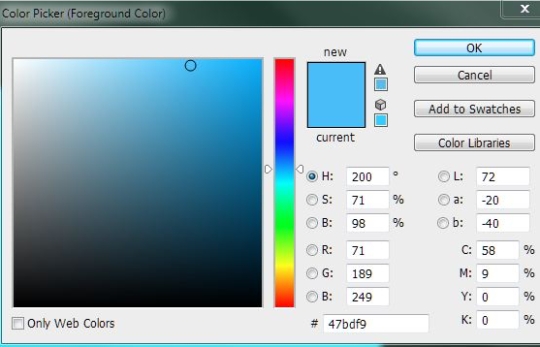
Step 2: Press G to activate the Paint Bucket Tool. Change the foreground color to #47bdf and fill the Background layer.
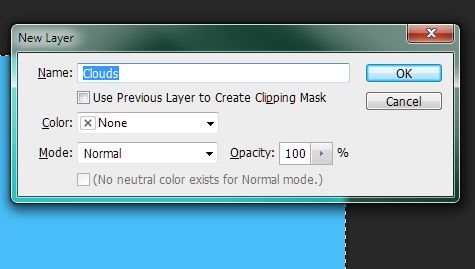
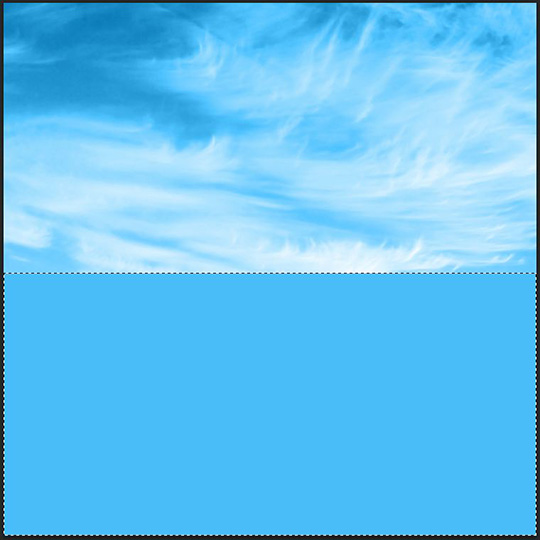
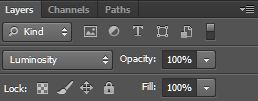
Step 3: Press Ctrl+Shift+N to create a new layer and name the layer "Clouds." Copy and paste a photograph of clouds into your document. I used this wispy photo posted by user Eastop on Stock.Xchng. You can visit this link to download the photo for free: http://www.sxc.hu/photo/1359418 . (Please contact Eastop if you plan on using the photo for commercial purposes). Press M to activate the Rectangular Marquee tool and select the bottom half of the document. Press Delete to get rid of the bottom half of the photo. In the Layers Box, change the Blending Mode to Luminosity.
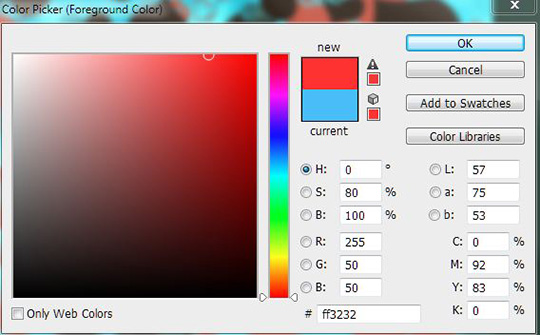
Step 4: Create a new layer (Ctrl+Shift+N) and name it "Hearts." Change the Foreground color to #ff3232 . Download and install a few heart-shaped brush sets, or you can try making your own. For my image, I used the brush sets from the following links: Hearts Brushes II by DeviantArt user Stardixa-Resources (http://stardixa-resources.deviantart.com/art/Hearts-brushes-II-112745476), Hearts for Valentines by DeviantArt user carmel5530 (http://carmel5530.deviantart.com/art/hearts-for-valentines-77082584), PS Brushes Set 1 - Hearts by DeviantArt user NeonxNerd (http://neonxnerd.deviantart.com/art/PS-Brushes-Set-1-Hearts-154832532), and Vector 'Style' Hearts by melemel (http://melemel.deviantart.com/art/Vector-Style-Hearts-48683023 , and her personal website is melsbrushes.co.uk).
*Note: If you use the brushes I used, please keep in mind that these artists do not want their brushes redistributed or used for commercial work without first contacting them. If you are creating this E-Valentine for personal use, it's fine to use them; however, if you plan to use them for a commercial project, be sure to visit their galleries and look through their stock use rules prior to downloading. :)
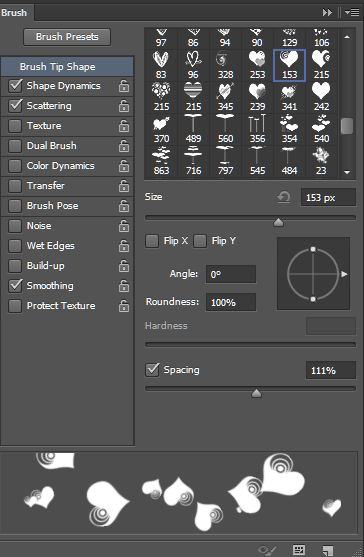
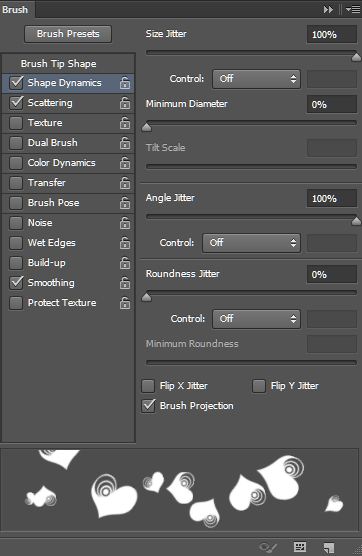
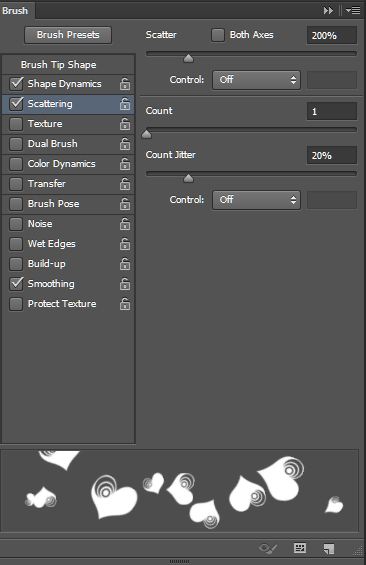
Step 5: Press B to activate the Brush tool, and select Window > Brush Presets and Window > Brush to open up the Brush options boxes. Select any of the heart brushes that you like and choose a size of around 153 px and set the Spacing to 111%. Turn on Shape Dynamics and Scattering, and select values similar to mine in the images below.
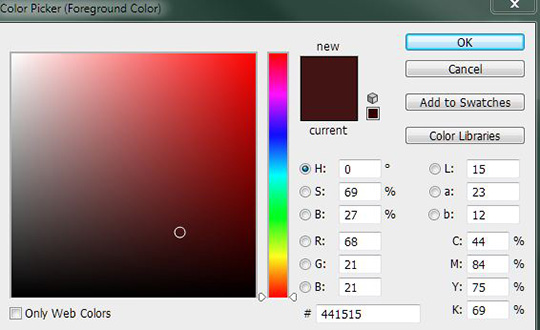
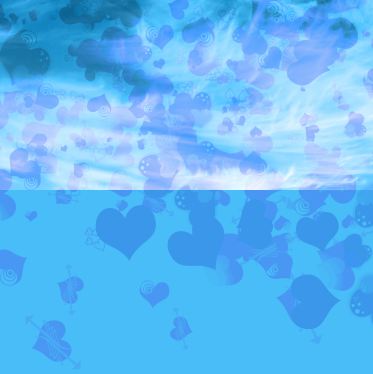
Step 6: Focusing on the top half of the image, click-and-drag to create a lovely mess of scattered hearts. Continue to select various heart-shaped brush tips and scatter them everywhere until you are satisfied with your image. For contrast, you can also scatter a few hearts over the top using the color #441515.

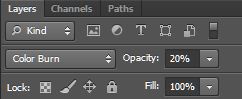
Step 7: Change the Blending Mode of the Hearts layer to Color Burn, and change the Opacity to 20%.
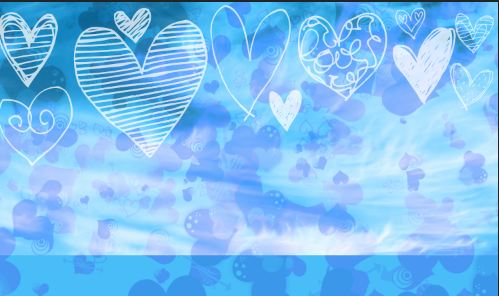
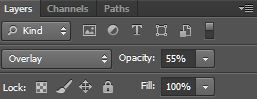
Step 8: Press Ctrl+Shift+N to create a new layer and name it "Heart Clouds." Set the foreground color to White. Pick out several heart brushes that look like doodles (the ones from stardixa-resources and NeonxNerd work best for this part) and stamp them accross the sky without overlapping to create a whimsical, heart-shaped cloud-like effect. Change the Blending Mode of the Heart Clouds layer to Overlay and set the Opacity to 55%.
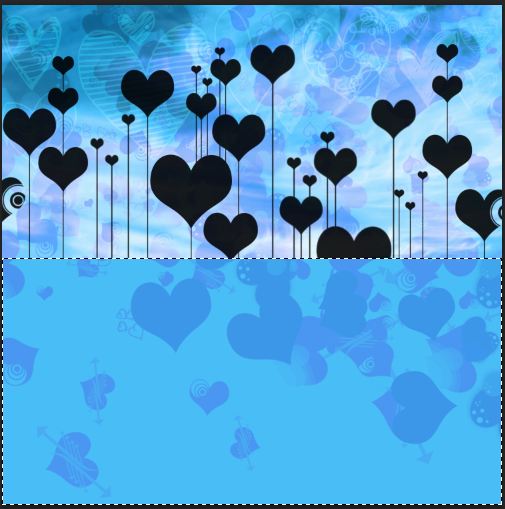
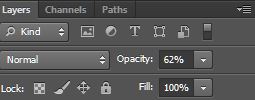
Step 9: Select Black as the Foreground color, and press Ctrl+Shift+N to create a new layer. Name the new layer "Heart Plants." Choose several different brushes that look like hearts on stems (the ones from the Vector 'Style' Hearts set by melemel), and place them one next to the other along the top half of the image. The concept here is to make them look like heart plants in the background. To fix the uneven stems, hold Ctrl and then click the Clouds layer to select it, and press Ctrl+Shift+I to invert the selection. Press the Delete key to delete the bottom half of the layer. Set the Opacity of the Heart Plants layer to 62%.

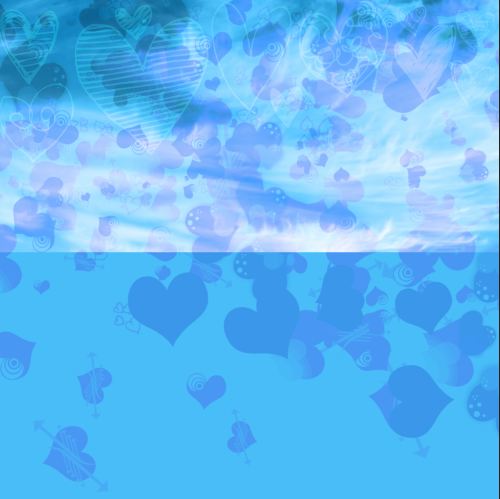
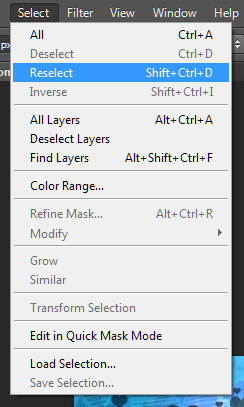
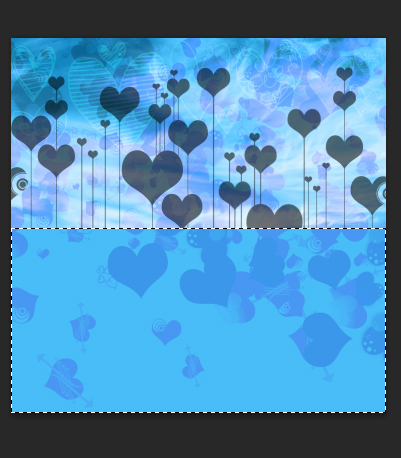
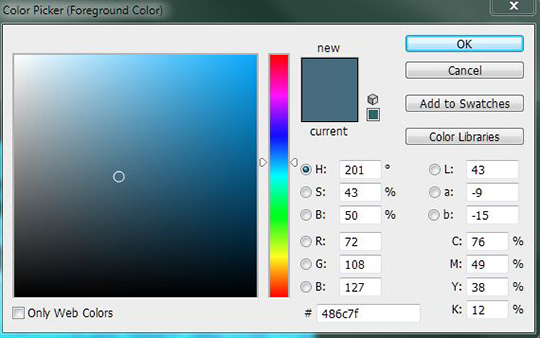
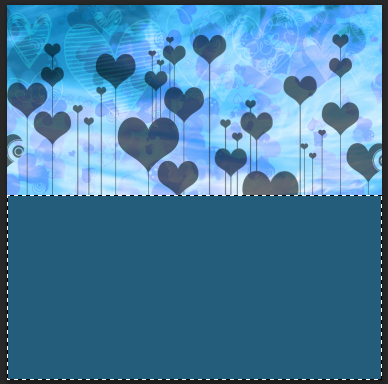
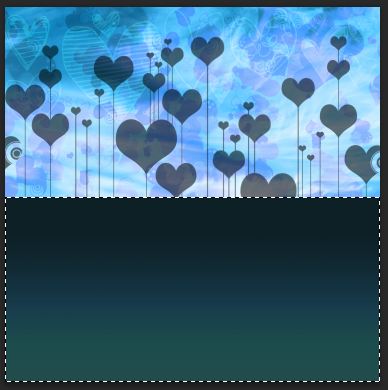
Step 10: Create a new layer (Ctrl+Shift+N) and name it "Bottom Half Fill." Press Shift+Ctrl+D or go to Select > Reselect to reselect the bottom half of the image. Change the foreground color to #486c7f . Press G to activate the Paint Bucket Tool. Click inside of the selection to fill it with color.
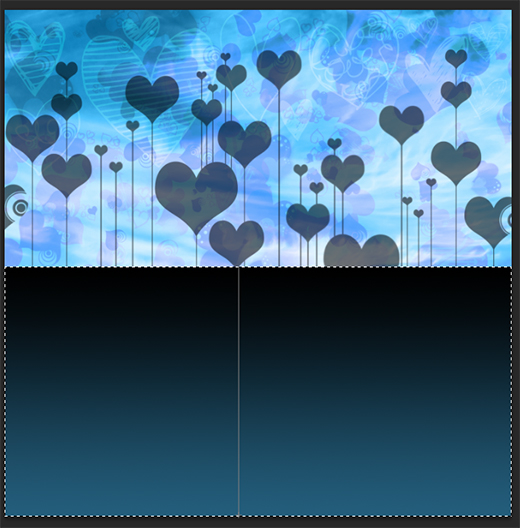
Step 11: Create another new layer (Ctrl+Shif+N) and name it "Bottom Half Gradient." Right-click the Paint Bucket Tool Icon and select the Gradient Tool instead. Keep the foreground color at #486c7f and change the background color to Black. With the bottom half of the image still selected, hold Shift to force a straight line, and Click-and-Drag from the bottom of the image to the half-way line. Change the Opacity of the layer to 75%.

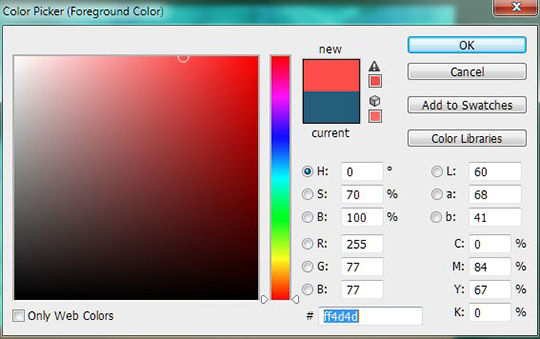
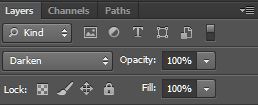
Step 12: Set #ff4d4d as the foreground color. Create a new layer (Ctrl+Shift+N) and name it "Toning." Right-click the Gradient Tool icon and switch it back to the Paint Bucket Tool. Fill in the bottom half of the image with the new color. Change the Blending Mode of the Toning layer to Darken.

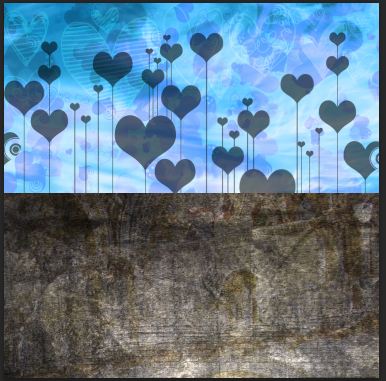
Step 13: Download the Victorian Grunge Texture Pack by DeviantArt User AF-studios from the following link: http://freaky665.deviantart.com/art/Victorian-grunge-texture-pack-125784217 (Read through AF-studios's stock use rules before using this texture in public projects). Drag the file named 03_1 into your Photoshop document. Resize the image to fit within your document, and drag it downward until the top of the texture touches the half-way line. Rename the layer "Texture Overlay" and change the Blending Mode to Overlay and the Opacity to 75%.
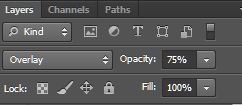

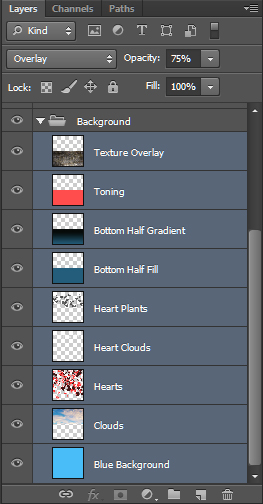
Step 14: Select the folder-shaped icon at the bottom of the layers box that says "Create a new group" when you hover over it. Name the new group "Background." Scroll down in the Layers box and click the very first Background layer. Hold down shift, scroll up, and click the Texture Overlay layer at the top. This should select all of the layers you have created so far. Click-and-Drag the highlighted layers into the Background group. Now that your layers have been sorted into a group, you can hide contents of the group by clicking the little arrow next to the Background group. This will make things more organized and less confusing when you move onto Section 2.


Congrats! The background of your image is now finished! It's now time to move onto Section II, which will show you how to create the neat, customizable 3D text.
Section II. Creating the Customizable 3D Text
Feel free to use any 3D Text Editing software of your choice during this part of the tutorial. I chose to use Xara 3D Maker 7. You may also use any font of your choice, but if you want your fonts to match mine, install the following (free) fonts: Teaspoon (http://www.abstractfonts.com/font/12578) and sarah is sober (http://www.abstractfonts.com/font/12087).
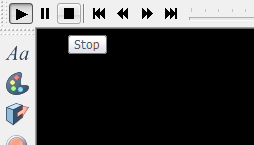
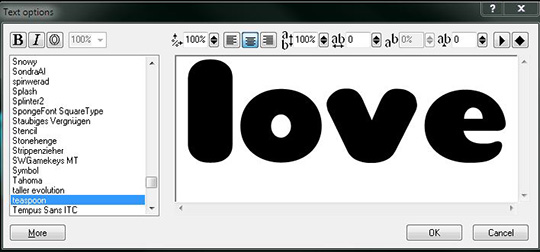
Step 1: Open up Xara 3D Maker 7 and press Ctrl+N to create a new project. Press the stop button at the top of the screen to stop the animation. Press Alt+T to open up the Text Options menu. Select any font of your choice (I chose Teaspoon, since it is curvy and wide) and type "love" in the text box. You can make this upper or lower-case, but I prefer the appearance of lower-case for this particular font. Click OK when you are happy with your results.
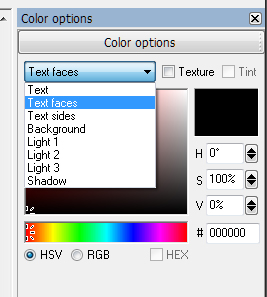
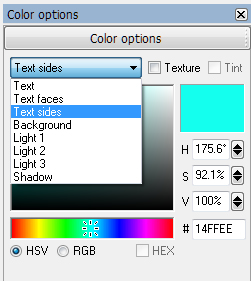
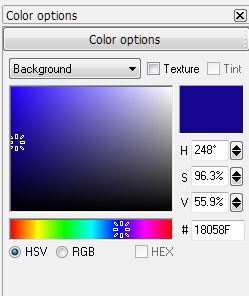
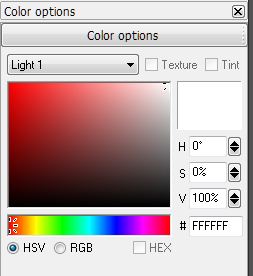
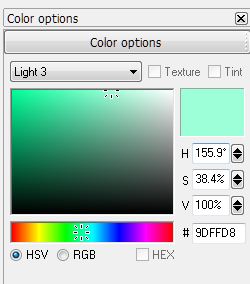
Step 2: Rotate the text to make it front-facing and tilted foward. In the Color Options menu on the right, choose Black as the "Text faces" color. Set #14FFEE as the "Text sides" color, #18058F as the "Background" color, #FFFFFF for "Light 1" and "Light 2," and #9DFFd8 for "Light 3."
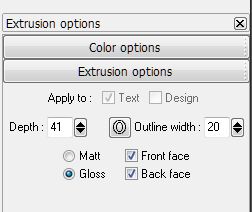
Step 3: In the Extrusion Options menu, change the Depth to 41, the Outline width to 20, and select Gloss, Front face, and Back face.
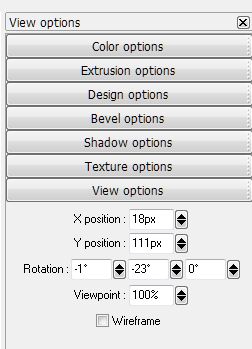
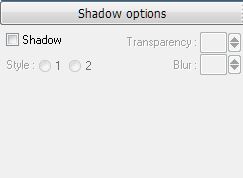
Step 4: In the menu on the right, select View Options, and change the X position to 18px, the Y position to 111px, the Rotation to -1 [degrees], -23, 0. The viewpoint should be at 100% and the Wireframe option should be left unchecked. Select the Shadow options menu, and turn off the shadow.

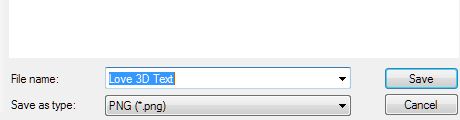
Step 5: Select File > Export, and save the file as a PNG.

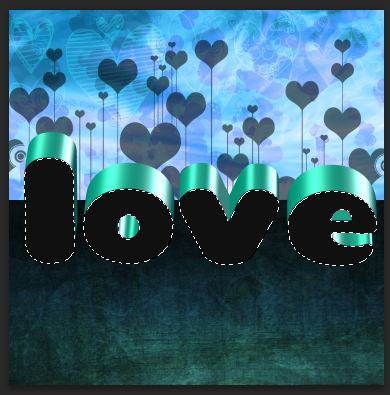
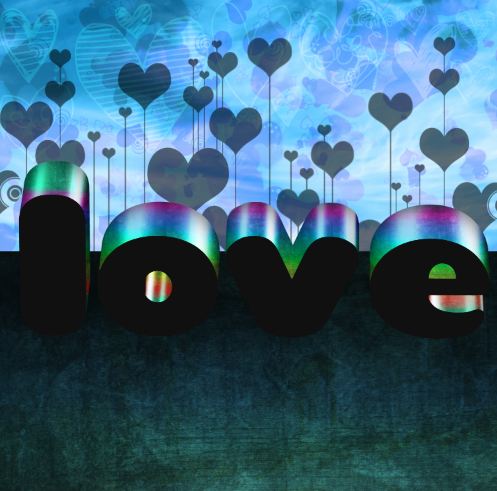
Step 6: Drag the file into your Photoshop document. When prompted, ask Photoshop to open the file as a Smart Object. Move the text so that it sits just below the horizon, or half-way line.
Step 7: Press W to activate the Quick Selecton Tool. Make sure that the "Sample All Layers" option at the top is turned off. Using this tool, select only the front, flat part of the text. In other words, select everything on the text that is black. If another part of the text gets selected by mistake, Alt+Click the area to remove that part of the selection.

Step 8: Press Ctrl+C to copy the selected. Create a new layer (Ctrl+Shift+N) and name it "Flat Front." Press Ctrl+V to paste the selection. The image should look the same, but this layer will be essential a few steps from now. Press Ctrl+D to deselect the image.
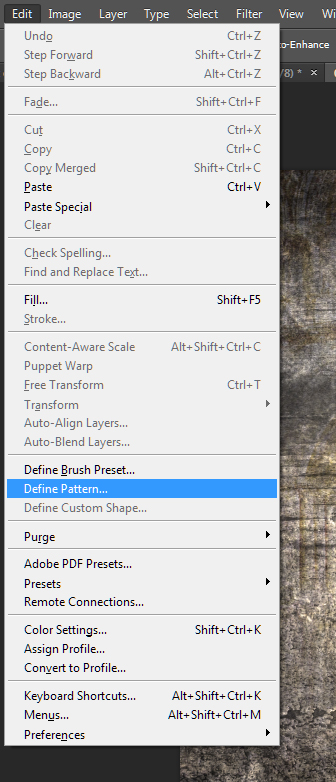
Step 9: Press Ctrl+N, and open AF-studios' file 03_1 from the Victorian Grunge Texture Pack that you downloaded in Section I (http://freaky665.deviantart.com/art/Victorian-grunge-texture-pack-125784217 ). Go to Edit > Define Pattern... Name the pattern whatever you want, and Click OK. Close the texture file.
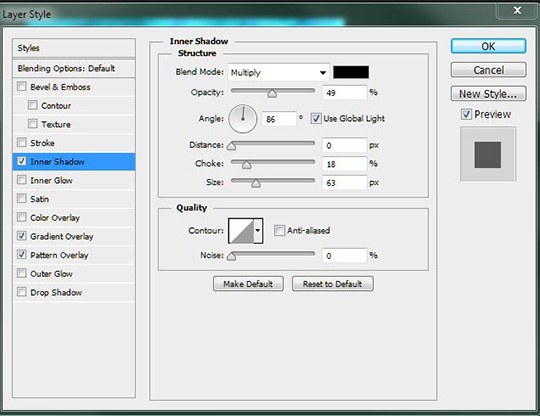
Step 10: Right-Click the 3D text layer and select "Blending Options..." Turn on Inner Shadow, and change the Opacity to 49%, the Distance to 0 px, the Choke to 18%, and the Size to 63 px.
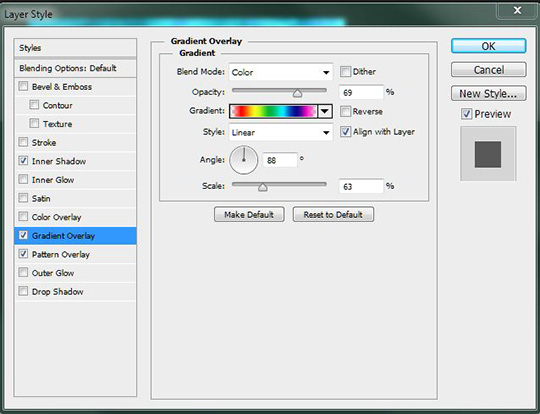
Step 11: Turn on Gradient Overlay. In the Gradient drop down menu, choose the second Rainbow option that looks like a diagonal rainbow that does not extend to the edges. Change the Blend Mode to Color, the Opacity to 69%, the Angle to 88 [degrees], and the Scale to 63%.
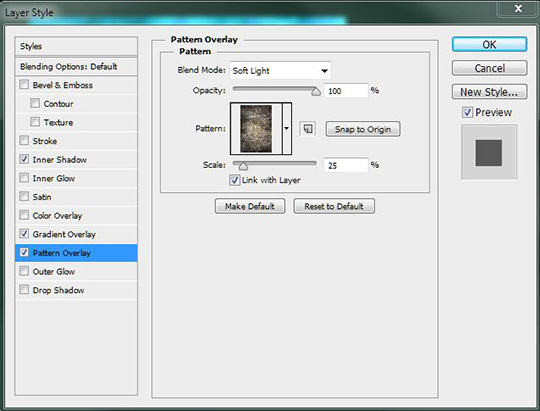
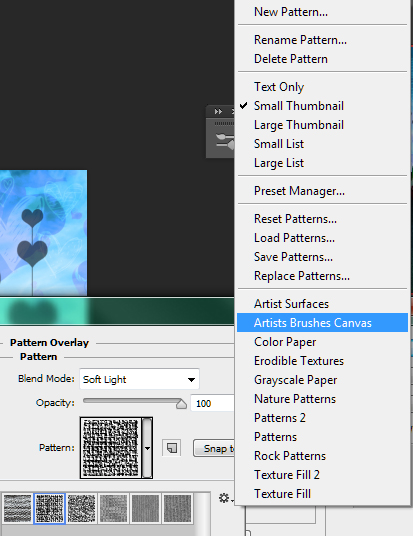
Step 12: Turn on Pattern Overlay. Change the Blend Mode to Soft Light, the Opacity to 100%, and in the Pattern drop-down menu, choose the Victorian Grunge Pattern that you just defined in Step 9. It should be at the very end of the list. Change the Scale to 25% and click OK.
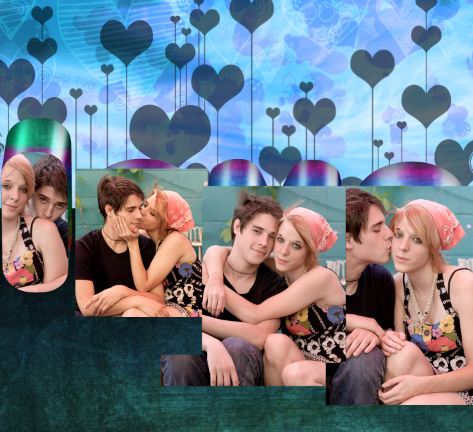
Step 13: Select four photos, one for each letter, of you and your valentine. You can select any photos you want for this project--it's totally up to you. For this tutorial, I used DeviantArt user Solsken-i-Hemmet's stock photos Two Models Stock. 01, Two Models Stock. 02, Two Models Stock. 04, and Two Models Stock. 05. Special thanks to Ryan McGoff, the photographer of these images, and DeviantArt User Solsken-i-Hemmet. You can view her gallery at this link: http://solsken-i-hemmet.deviantart.com/gallery/5821749
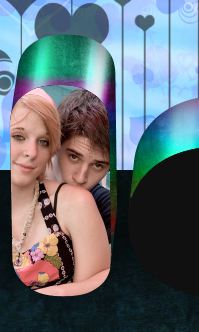
Step 14: Create a new layer (Ctrl+Shift+N) above the Flat Front layer and name it "L Photo." Drag the file or copy-and-paste the image that you want to fit inside the L into Photoshop. Resize the image (press Ctrl+T activate the Transform tool for resizing), and position the image over the L using the Move Tool (press V to activate this tool). You might have to select and delete any part of the image that overlaps onto the other letters.
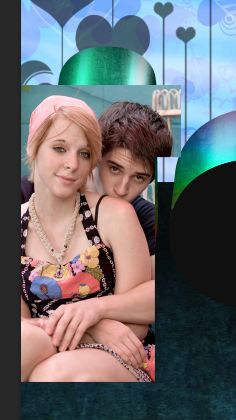
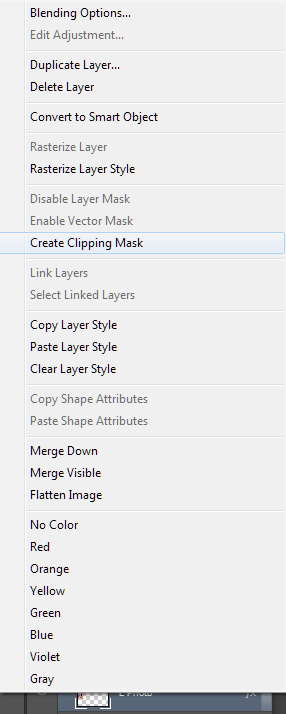
Step 15: Right-click the L Photo layer and select "Create Clipping Mask." This will trim the photo into the shape of the layer below it.
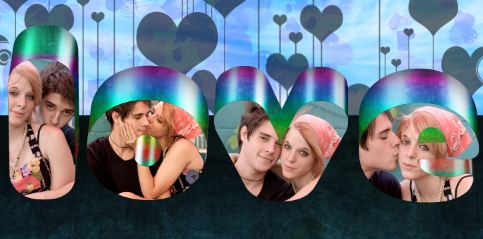
Step 16: Repeat steps 14 and 15 until each letter has a photo fit to the front surface.
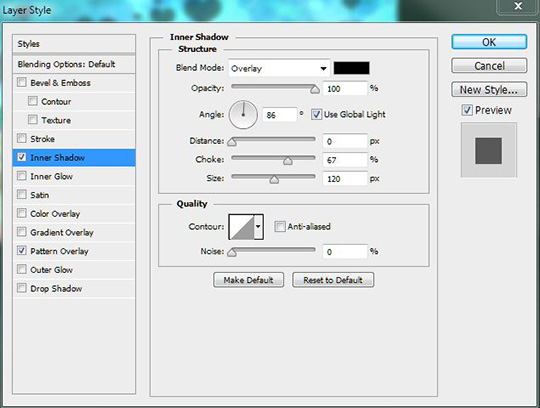
Step 17: Right-click the L Photo layer and select "Blending Options..." Turn on Inner Shadow. Set the Blend Mode to Overlay, the Opacity to 100%, the Distance to 0 px, the Choke to 67%, and the Size to 120 px.
Step 18: Turn on Pattern Overlay. Change the Blend Mode to Soft Light, the Opacity to 100%, and the Scale to 14%. In the Pattern drop-down menu, select the little gear icon, and choose Artistic Brushes Canvas. Select the second pattern, which says "Raw Linen" when you hover over it. Click OK.

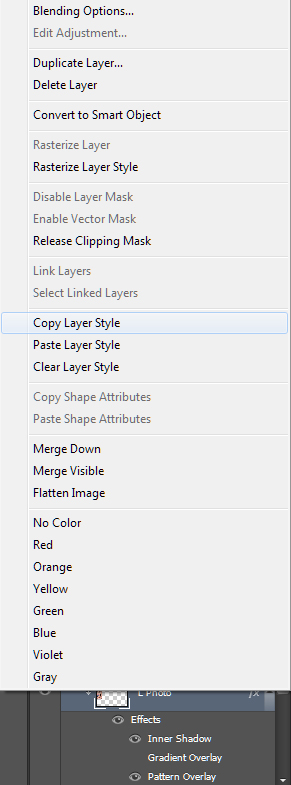
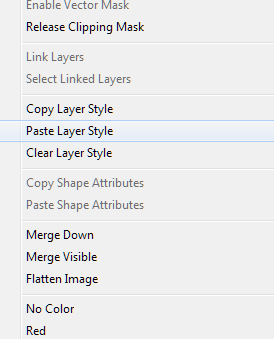
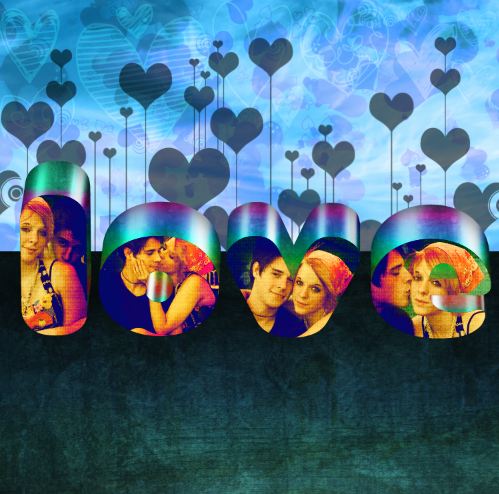
Step 19: Right-click the L Photo layer and select "Copy Layer Style." Right Click the O Photo layer and select "Paste Layer Style." Past the layer style onto the rest of the letter images.
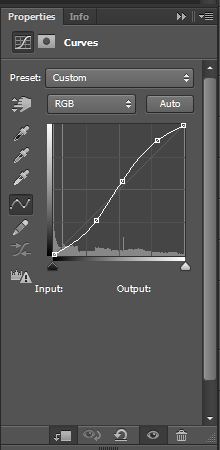
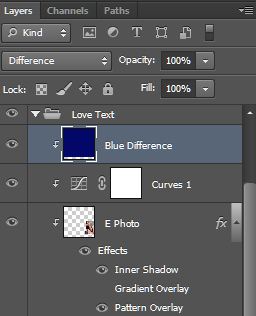
Step 20: Make general adjustments to the photos using Adjustment Layers. The adjustments you make will depend upon the photo and your personal preference. Make sure to Create Clipping Masks out of the Adjustment Layers so that they only affect the letter-photos. For my photo, I made adjustments to brightness and contrast using a Curves adjustment layer. I also created a new layer, and filled it with dark blue, and changed the blending mode to Difference.
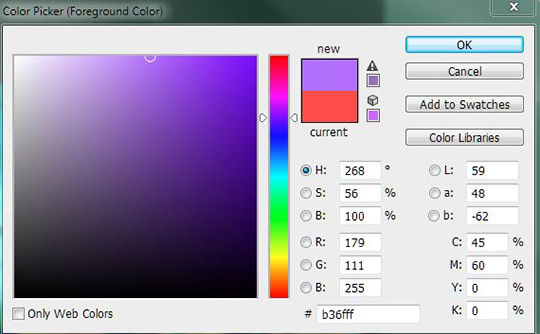
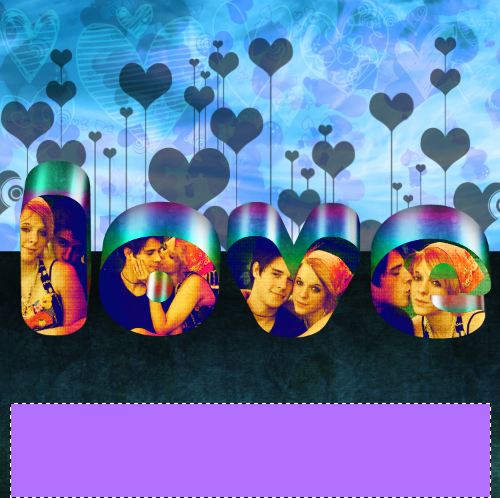
Step 21: Create a new layer and name it "Text Square." Press M to activate the Rectangular Marquee Tool, and make a long rectangle near the bottom of the image.
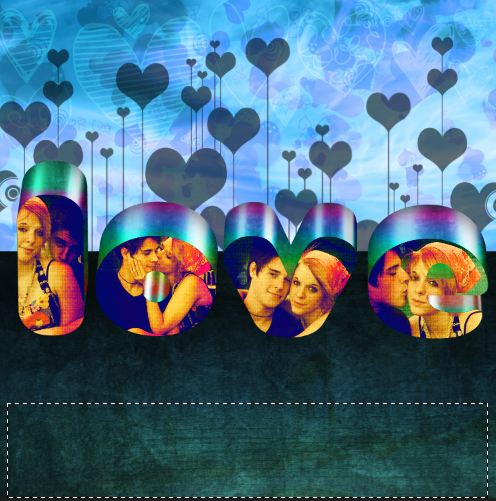
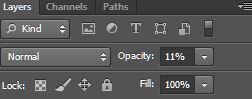
Step 22: Set #b36fff as the foreground color. Press G to activate the Paint Bucket Tool, and click inside the selection to fill it with light purple. Change the Opacity of the Text Square layer to 11%.
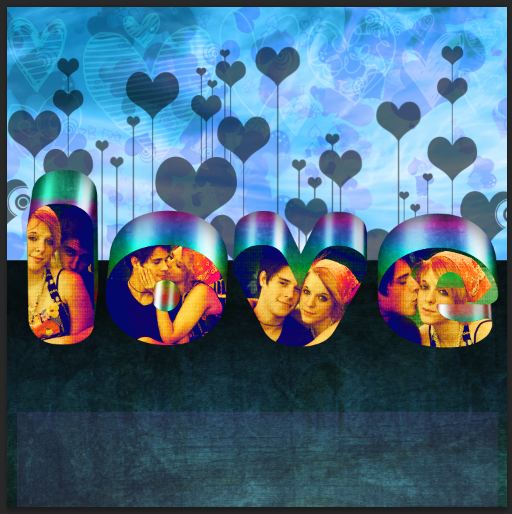
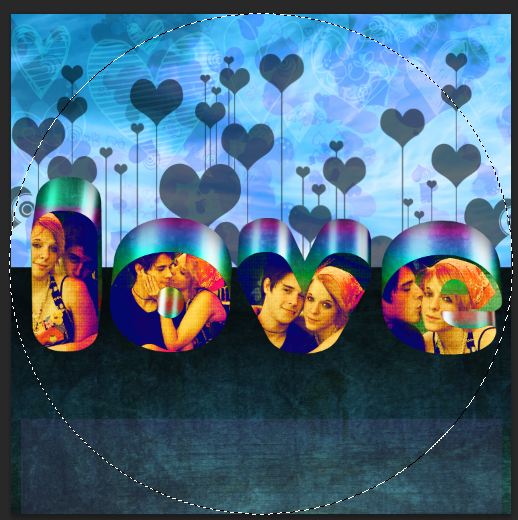
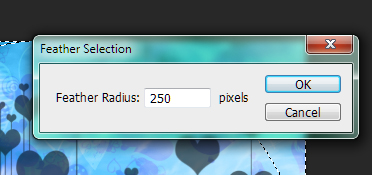
Step 23: Create a new layer (Ctrl+Shift+N) and name it "Vignetting." Right-click the Rectangular Marquee Tool icon and select the Elliptical Marqee Tool. Click just inside the upper left corner of the image and drag toward the bottom left corner. Press Ctrl+Shift+I to invert the selection. Press Shift+F6 to Feather the selection and set the radius to 250. Click OK.
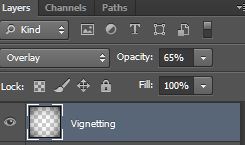
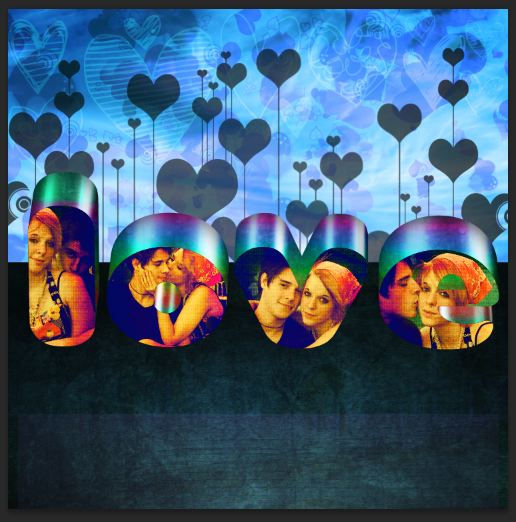
Step 24: Press G to activate the Paint Bucket Tool. Set Black as the foreground color. Click in one of the corners of the selection to fill it with Black. Change the Blending Mode to Overlay and the Opacity to 65%.
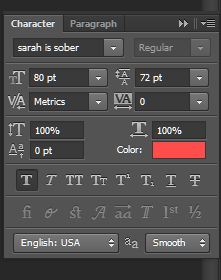
Step 25: Press T to activate the Type Tool. Click inside the transparent purple square at the bottom, and type a message to your valentine. Press V to activate the Move Tool and center it in the transparent purple square. Select Window > Character to open font options. Change the color to #ff4d4d and the font to "sarah is sober" (or any font of your choice). The size of my top line is 90 pt and the size of my bottom line is 80pt. I also turned on the Bold option (the fat T icon), and set the leading to 72pt.
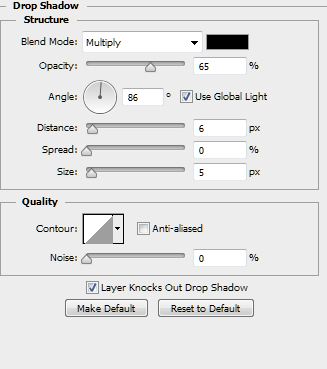
Step 26 (Optional): Right-click the text layer that contains your message and select "Blending Options..." Turn on Drop Shadow. Set the Opacity to 65%, the Distance to 6 px, the Spread to 0%, and the Size to 5 px. Click OK.
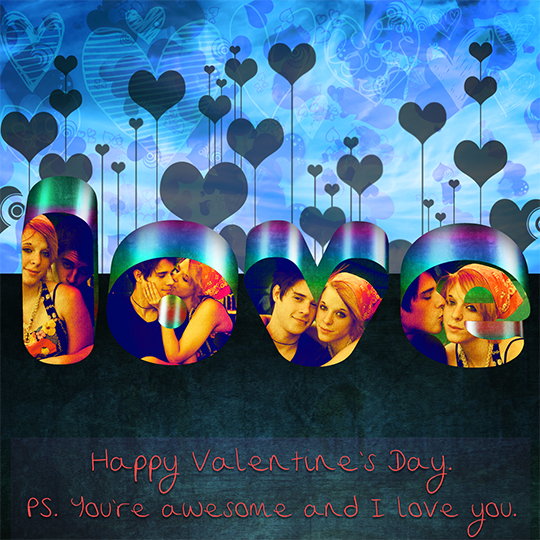
Yay! You've just finished your own personalized digital valentine! Save a copy as a PSD and one as a JPEG so that you can easily share it with your loved one this Valentine's Day.
I'd love to see what your final images look like, so feel free to share a link to your results in the comments!
Happy Love Day <3
Related Posts:
About the author

Copyright © . All Rights Reserved