Make a Realistic Star Field

Let's face it: stars can be really hard to draw. I'm not talking about the singular balls of blazing gasses, though, I'm talking about the subtle and beautiful star fields that make a piece of celestial art what it is: a portrayal of space. One of the reasons space is so much fun to draw is because, despite the plethora of Hubble images inundating cyberspace and science magazines, most people don't have a preconceived notion of what space should look like. This means that there are endless possibilities for wondrous visuals, as nobody's been to or seen wherever or whatever it is that you're depicting.
There is one exception, however: stars. We've seen these before: we know what they look like, and what they don't look like. This means that a couple clicks with the spray-can is just not going to cut it when you're working up a good star field to finish off your creation. The spray can is a means to begin developing a good star field, but to rely entirely on the computer to randomly assign stars is quite simply a cheap solution to what could be the defining details of your piece.
Another approach is the ever so convenient noise filter, but shame on you if you use this filter alone and think it sufficient! Do you want to draw space, or let your computer draw it for you? Let's consider this for a moment... do either of these "solutions" even look like stars? (Does space look like a snowstorm on crack?) I don't think so. In order to draw deep space, even as a background for a more important subject or scene, you've got to think about what it actually is that you're drawing. We're not talking about mere pixels here, we're talking about millions of pinpricks of brilliant light, stretching back in layer upon layer, plane upon plane. We're talking about space, a vastly deep expanse filled with exquisite lights and shadow. (You've got to get excited about this subject, because that is what is going to power you through the effort it takes to develop a truly great space piece.) What we're talking about when we create our star field is an expression of depth, and this is communicated through two factors: variety and density.
Variety
Looking at Hubble images, you can easily find images of stars where the entire image is jam-packed with as many of the brilliant suckers as possible. True, some star fields are like this, and I've seen several people draw stars with this effect in mind, but they always seem to leave out any sense of variety.
Look at the Hubble images: are all the stars the same size? Do they all shine with the same brilliance? Sometimes (and this depends on the filter used to get the real image in question) the stars aren't even the same color. This leads me to assert that all stars are NOT created equal. (Thankfully, physics is here to back me up on this one.) Similarly, stars do not all sit on the same plane of view. Some are far, some are near, etc and so forth. As such, when you're developing a star field, it's a good idea to have a variety of stars represented.
How do they glow, how bright are they? Are they big? Are they small? Do they twinkle or have little crossbars coming off them? Or are they just specks of light? Any and all of these are absolutely fine, and it's up to you to determine a good mix of each. From this point onwards, I'm going to assume that we're drawing a generic star field without any special use. As such, I'd advise using a small handful of larger stars with more detail, and medium to large amounts of the mid-level and smaller stars respectively. The trick is to get an appreciable gradient of star sizes represented in your work. Another thing to consider is that not all stars shine as bright as their neighbors: smaller, dimmer stars are often a good thing to have to give an even more refined sense of variety to your work. Fortunately, an earlier version of Photoshop free can help you with giving your work a sense of variety.
- Adobe Photoshop CS6 Classroom in a Book
- Photoshop CS6: Visual QuickStart Guide
- Photoshop CS6 For Dummies
- Adobe Photoshop CS6 Digital Classroom
- Photoshop CS6: The Missing Manual
- The Adobe Photoshop CS6 Book for Digital Photographers
- Adobe Master Class: Photoshop Inspiring artwork and tutorials by established and emerging artists
Density
Once you've established the types of stars you're working with, think about where they'll be in relation to each other. One of the problems with using a spray-can tool or noise filter alone to generate stars is that it's not always entirely random. Stars are not always spaced out evenly: they come in clusters, densely packed like a giant hand came along and brushed them all into little piles on your screen. They also can spread out to the extremes, with a vast amount of space being occupied by only a handful of stars all by their lonesome. Both are good, and using both together is even better. The way I see it, drawing a star field isn't about clicking madly with a paintbrush tool just to get the background for a particular piece finished (although I'm in full agreement that this is hardly the most glamorous part of celestial art). Drawing a star field is best done when you're telling a story with the stars. Stars have gravity. They evolve. They drift. If you wanted to go the extra mile, you could even start adding an ambient glow to the clustered parts to show the stars interacting with each other. The possibilities are endless: go nuts.
Environment
Once you've developed a good star field, it's important to use it correctly. Lots of people tend to just slap stars on top of their pieces, erasing where there's a planet or a nebula or some other exciting thing. That's all good and well, but something worth considering is how your background star field interacts with your piece. In particular, an element I often see missing is light pollution. For those of you unaware of this phenomenon, light pollution is where an ambient light source or proximity to a light source makes dimmer lights invisible. And example of this can be seen in every major city today, where you're lucky to see a handful of stars at night due to the interference of the city lights. Space exhibits the same phenomena, although the light sources are often the very nebulae, planets, or burning stars you're drawing in the first place. As such, keep in mind that the dimmer stars in your background field might be drowned out by the radiance of the objects in the foreground. Keep in mind also, in the case of nebulae, dark matter is dark for a reason: it's either blocking light or refusing to reflect it. There aren't any rules for how you should treat your stars in any of these afore-mentioned cases, but they're something to consider.
One Final Note
That pretty much wraps up what I have to say about stars. One final note, however: you may have noticed that as I'm writing, I alternate between speaking about "drawing" and "developing". That's because, just as stars themselves just don't pop into being from nothing, your star field won't either. You've got to start with something broad and then refine your composition to the perfect piece. I won't go into detail here on exactly how to go about developing your star field in step-by-step detail, but I will say that it's always beneficial to start with as big a canvas as you can. If you make a good star field, and it's huge to begin with, you can reuse it in a number of ways and save yourself work in your later artistic endeavors. In other words, work hard, but work smart as well! Getting a good star field is worth a decent amount of effort on your part (you only get out what you put in, after all), but not worth having to work redundantly.
[Actually, I am going to give you a step-by-step guide to creating stars, just keep in mind that the article wasn't written with the intention of working as an introduction to this tutorial... it just worked out that way.]
A thank you to Kyle Nervik of Bougal.com, who helped me figure out how to best relate my methods to a general audience by being my development guinea pig (sitting on AIM for over an hour, listening to me argue with myself, and offering suggestions). Thanks, Kyle!
The Basics
As stated in the short article above, it's always a good idea to work with the largest image size possible. This is because no matter how good your finished art looks, it will almost always look even better smaller. For the purpose of this tutorial, I'm working with a small canvas (300 by 350 pixels) but I recommend creating your starfield image at least twice as big as the image you're aiming to use it in-or even larger, if you want to reuse your stars in a variety of pieces (like I do). A good star field takes a lot of work to create, but can be used repeatedly depending on your level of customization, so you can get away with using it repeatedly.
A few notes before starting: I also stated above that using the noise filter by itself is undesirable. However, using it to get started is quite acceptable. Also, dust off your computer screen before actually beginning this tutorial... some of the early example images are fairly subtle.
To start, first create a new document of your preferred size with a black background. Its important to make sure it's a BLACK background; otherwise, you could possible get undesirable color effects later.
Next, create a new layer, name it "small stars," and make it completely black as well. We're doing this because later we'll be erasing, and we want a pure black background to show through the holes we create in this new layer.
Now add noise to the picture. To do this, go to Filters > Noise > Add Noise and generate a noise field using the following settings: Amount: 10%, Gaussian, Monochromatic. This will make a very subdued but detailed noise field. It may look dim, hard to see, and unlike stars, but keep it like that for now. Once the image gets brighter, it's hard to go back to dimmer stars (trust me on this).
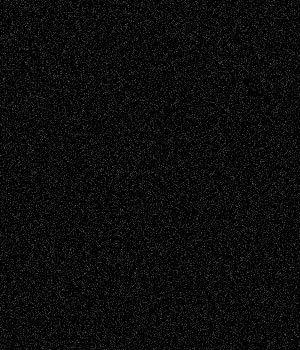
The next step is to "diversify" the star field by bringing out the brighter stars and getting rid of the dimmer, almost invisible stars so they don't clutter up our space scene later.
Go to Image > Adjustments > Brightness & Contrast and run Brightness: -30 Contrast: 75. You'll notice some appreciable (but still subtle) results right away.
In these beginning steps, keep things low-key and subtle. Right now, we're just laying the groundwork. Brighter stars come later.

We're not done yet not by a long shot. Duplicate your small stars layer and name the duplicate "large stars."
Run Brightness & Contrast again, this time with Brightness: -100, Contrast: 50. This thins out the stars even more to leave only a few fairly bright ones.
Then scale the large stars layer by hitting ctrl + T
and dragging while holding the shift and alt keys
to keep the proportions of the layer consistent.
[The concurrent keys on a Mac are Command-Shift]
Scale the large stars layer to approximately twice the size of the original. You'll need to zoom out a decent amount to do this, and don't worry about the fact that most of your new layer is outside the image boundaries what we're about to do will apply itself to the whole layer regardless.
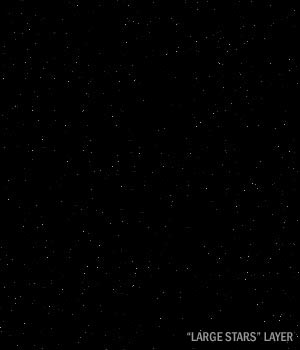
Invert (ctrl + I) your large stars layer. We're doing this because it's easier to see the results of the next step with black specks on white. You should now have a whole bunch of fuzzy grey specks.
Hit ctrl + L to bring up the Levels dialogue box and enter the following settings into the top where it says "Input Levels." In the three boxes from left to right, enter the values 230, 1.00, and 250.
This increases the contrast of the image with a fine control, giving us specks that are nicely defined and ready to become our larger stars.
Hit OK.
Invert the layer again, bringing it back to the normal white stars on black look.
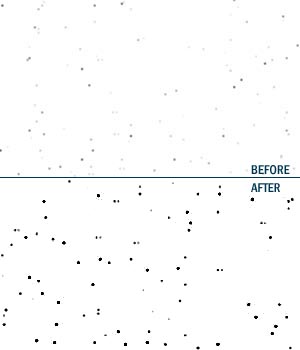
Hit ctrl + T again and scale that puppy back down so that it's just a little bit larger than the image you're working with.
Hit Enter.
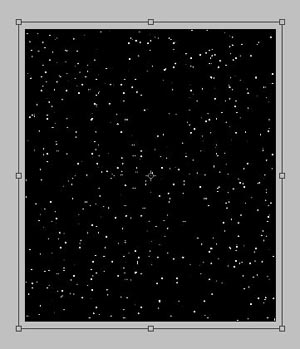
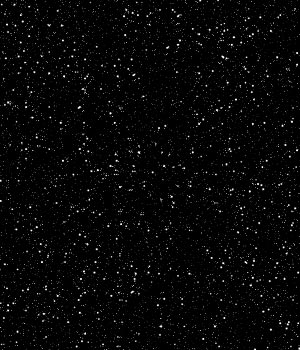
At this point you can change the layer mode of the large stars layer to "screen." You'll notice a sort of tacky "echo" effect going on. We will fix that right away by rotating the layer 180 degrees.
Hit ctrl + T one more time and move your cursor to a corner of the large stars layer so you get the rotate arrow cursor (looks like the resize cursor, but bent). Hold shift and then click and drag, rotating your large stars layer 180 degrees.
Hit Enter.
The Story
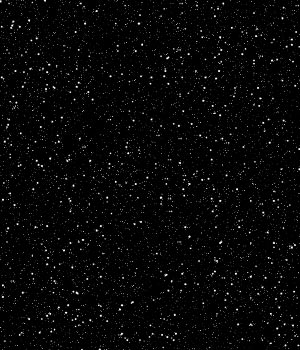
Okay, so now we've got a very basic star field. However, there's
one problem. This is the most boring, depressingly monotonous star
field ever made. What we want is a star field that tells a story
of stellar evolution, with clusters and deep space and such. This
is the intuitive part of the process, so you may have to save
this Photoshop file and try several times before you're truly happy
with your results.
Take your eraser and start erasing bits and pieces of each layer separately. Be as random as possible.
There is no wrong eraser brush size, although you'll want one with a crisp edge and nothing smaller than about 10px.
Go nuts.
What we're doing here is randomizing the star field in a human fashion, so it doesn't look so computer generated. In order to make it better, however, we've got to thoroughly trash it first.
Additionally, you should see fewer large stars than small stars, so be especially brutal on the large stars layer.
This is also an opportunity for you to eliminate any obvious patterns you see in your stars (sometimes the computer starts generating patterns with its noise generation) and we want to nip those in the bud.
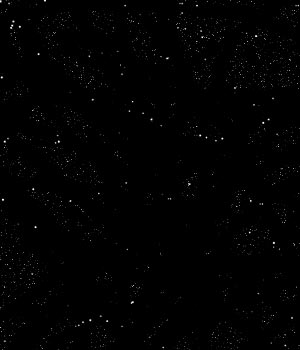
Once you're all done and have a sad, pathetic star field, flatten your document (Layer > Flatten Image).
It's time to start cloning your stars and "shaping" your star field.

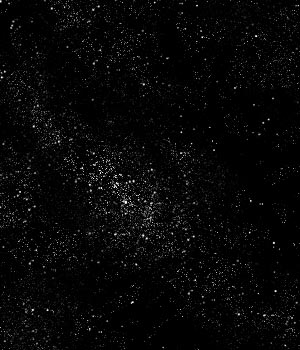
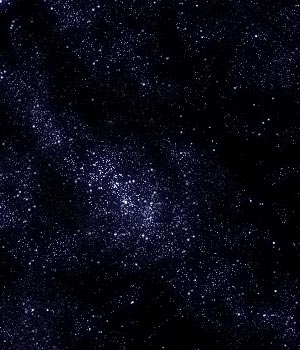
The idea here is to now start telling a story with your stars. This is where you make your clusters and dark spaces come alive. Try using the clone brush both in normal mode, or in "screen" mode (you can change the modes in the options bar across the top of your screen), which will add the stars you clone instead of merely replacing the underlying canvas. This will also bring out some of the smaller, dimmer stars that you never really see, giving you a much broader range of stars (which is always a good thing!)
There is no set technique for this process -- it's all based on gut instinct and whim. Avoid cloning edges, as the stars will form a very noticeable edge. Also avoid cloning stars and placing them right next to the selected source area.
The Details
Alrighty, that's much better. Again, you may need to experiment
with this to get a result that you're really happy with. Finally,
we come to the step that's the most fun by far: adding glow.
Duplicate your layer again and name this new layer "star glow."
Go up to Filters > Blur > Gaussian Blur. Blur with a radius of about 6 to 8.
Hit OK.
This gives us a diffuse blur where we have the highest concentration of stars, as if the cluster of stars was glowing brighter as a whole. Change the mode of the star glow layer to Linear Dodge (or screen if you're using an earlier version of Photoshop).
Hit ctrl +B to bring up the Color Balance dialogue box. Using color balance (also found under Image > Adjustments > Color Balance) give your glow a color. This is entirely at your discretion. (I've always enjoyed a good blue, so that's what I'm going with.)
That's it! You've got a star field! Actually, you've got an intermediate star field. If you TRULY want to go the extra mile, you can start adding background dust, larger stars (camera flares work remarkable well when shrunk down) and spatial anomalies. This is entirely up to you. The main point is that your creation is a) distinctly yours, and b) much better than the crap Bryce or any other program that boasts star field generation puts out. Why? Because YOURS is human-made, not based on predictable algorithmic output.
Other Details
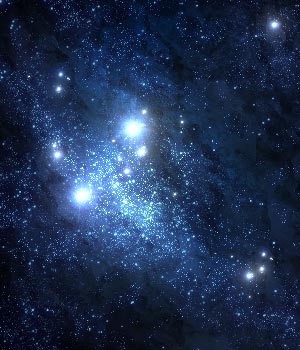
As you can see, I've gone a few extra steps in my star field...
Some of the items I've added include the following:
Lens Flare Stars
Create a new layer and fill it entirely with black. Set the layer
mode to Linear Dodge (this is the best mode, screen just doesn't
cut it sometimes). Render a lens flare (Filter > Render
> Lens Flare). Duplicate the layer and resize as needed to create
dynamic star clusters in the foreground. (You'll need a flare
layer for every single star you want to create.)
Space Dust
Grab a big fuzzy brush (size is your call) and add a texture to
it. For details on how to do this, look at my Make
a Planet tutorial, it's explained in detail (and the same texture
from that tutorial can actually work quite well here). Create
a new layer above your star layer(s) and set the mode to Linear
Dodge or Screen. Start brushing on dust with a
color of your choosing (a transparent brush of 20% opacity works
well here). Sometimes it works well to put a lot of textured color
strokes down and then erase the excess away until you've
got what you want.
The Secret
The real secret to star fields, however, is not just the human touch:
it's all in the simple process of never stopping.
All the steps I've laid out for you can be repeated, taken
out of sequence, etc. In fact, the more layers you have, and the
more work you put into your star field, the better it will be, because
you're drawing closer and closer to the crucial aspect of
a star field that most people overlook: it isn't drawn
at all, it evolves.
Frustration
The frustrating part of all this is that, since you're specifically
moving away from the computer-generated look, you leave
the comfort of a set method or recipe for success in creating stars.
Intuition plays a large part in this tutorial, which I am finding
hard to account for and explain (for that, I do apologize). If you're
a relative newcomer to photoshop, the steps I've listed above should
help you on your way, but the real work in creating the look you
want is only available through repeated attempts. The old adage
"practice makes perfect" is applicable here... much as
you may want to shoot me for saying it!
Copyright © . All Rights Reserved