St Valentine's Day Photo Manipulation (Exclusive Tutorial)
Hi, today I will teach you how to create some really cool St. Valentine's image in Photoshop with a trendy stylish approach that you can use for either commercial or personal project of yours. So let's get started.
Some useful resources:
- The Best Photoshop Actions Ever
- Photoshop tutorials
- Freebies: Round-up of 100 Free Textures
- 100 Free Patterns to Boost Your Creativity
- Adobe Photoshop CS6 Classroom in a Book
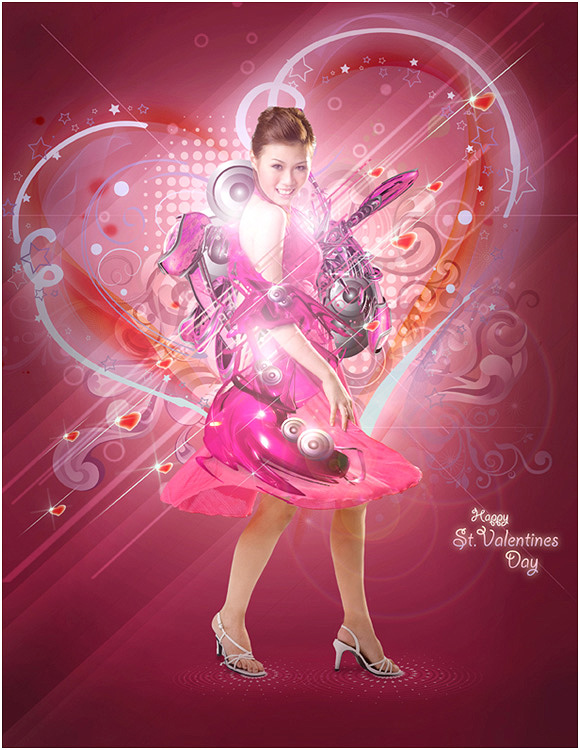
The Final result:
Subscribe to our newsletter and get useful tutorials and huge bundles with design freebies once in two weeks:
Step 1
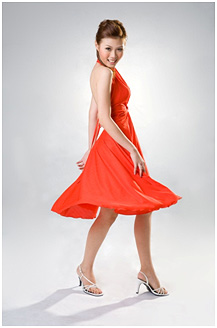
First we will need an image that we can edit. I got this from shutterstock.com and I think it's perfect for this project. You can also use a photo of your sweetheart to make your St. Valentine's Day greetings as unique as possible.
Step 2
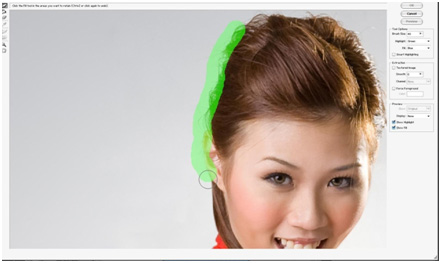
Now, we need to extract this using the extract tool in Photoshop and remove the background to fully manage our model for the project. For this I'm using the brush size 40
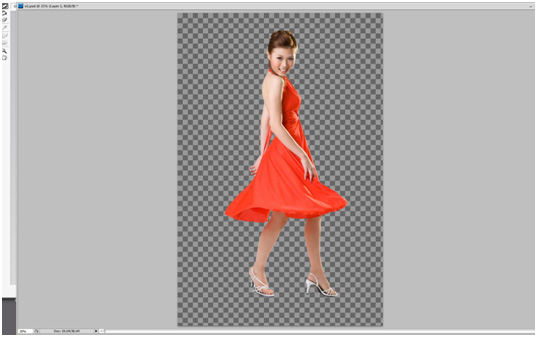
Now, we've already got rid of the background here.
Step 3
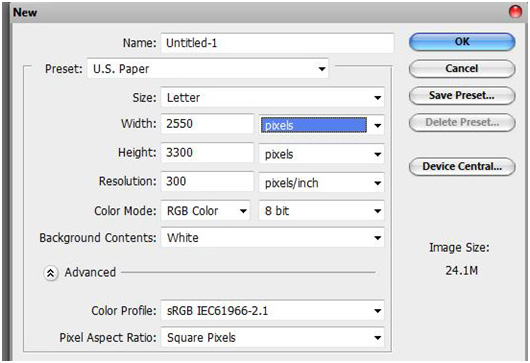
Next we need a new document. Go to file>new and choose a letter for the size, width 2550 and 3300 for the height and 300 for the resolution and press ok.
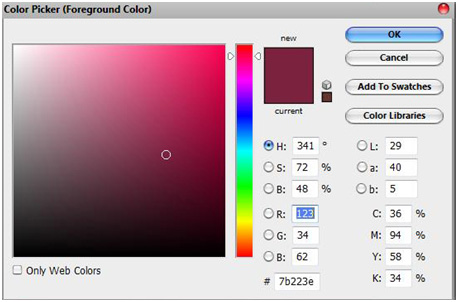
And we're going to fill it using the gradient tool and fill it with the color #7b223e

Step 4
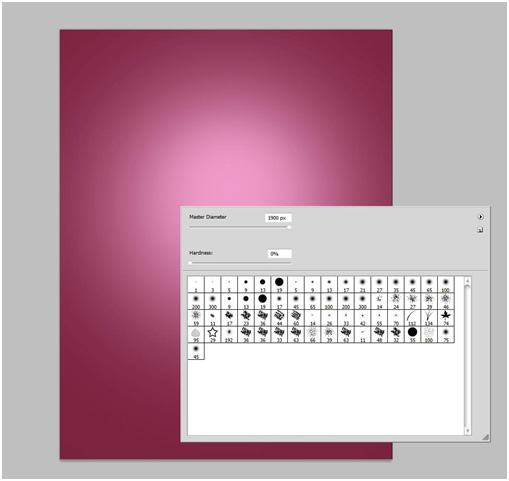
Now that we have the background color, all we need to do now is to lighten up the center of this using a soft brush.. I'm using 1900 px and and a 0% of hardness.
Step 5
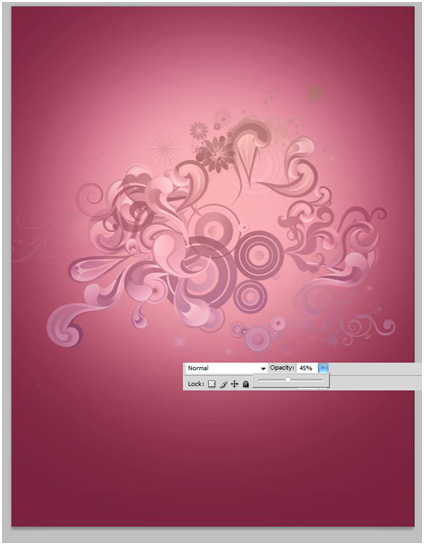
After we lighten up the center, the next thing we'll need to do is to start putting our vector design. Mine is made in Illustrator, using the pen tool and filled with the gradient tool. You can also easily modify the sharpness of the shape.. like this one, I decrease the opacity to about 45%.
If you feel that you don't have enough skill to create your own vector design you can download my ready-made swirls here.
Step 6
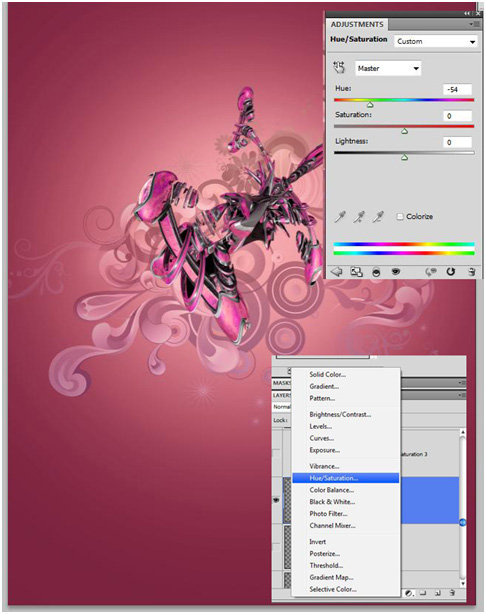
After puting our vector design background, we'll need to to put another background without lowering the opacity. Aside from the background that we've put first this one will serve as one of our main subjects in the background. And we will be using some 3d render. The 3D render here is made by unscenemedia. Change the hue and saturation like i did on this one. Using the command CTRL+U, or click in the icon beside the layer mask icon located below the layer pallette... In that way it will fit our theme..
Step 7
After putting our 3d render and modifying its hue and saturation, we will now put our model and modify her dress too.. using a quik mask tool and brush the whole dress that we want to modify it.
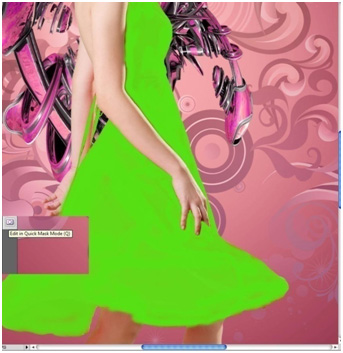
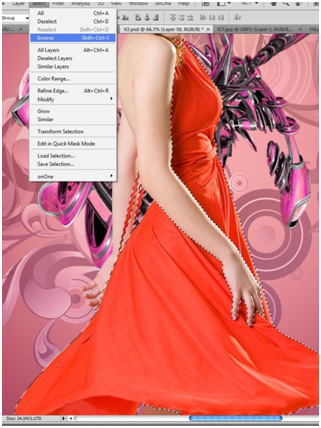
Then exit the quick mask tool an d go to Select>Inverse
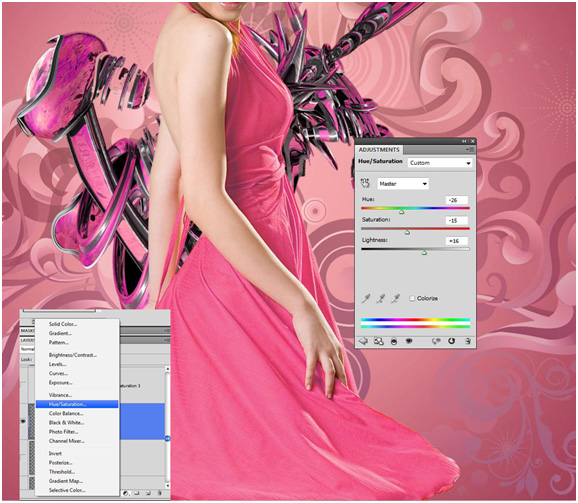
And now modify the hue and saturation,using the command CTRL+U to achieve the color that we want. Mine I've made is -26 on the hue, -15 on the saturation and +16 on the lightness
Step 8
After we put our model and modify her dress, we will now proceed to our next vector design wich is also created in Illustrator using some simple circle shapes that I 've made and fill it using some gradient tool to look like a simple speaker.. and put it behind the 3D render that we've put in earlier, like this..
You can download my speakers here
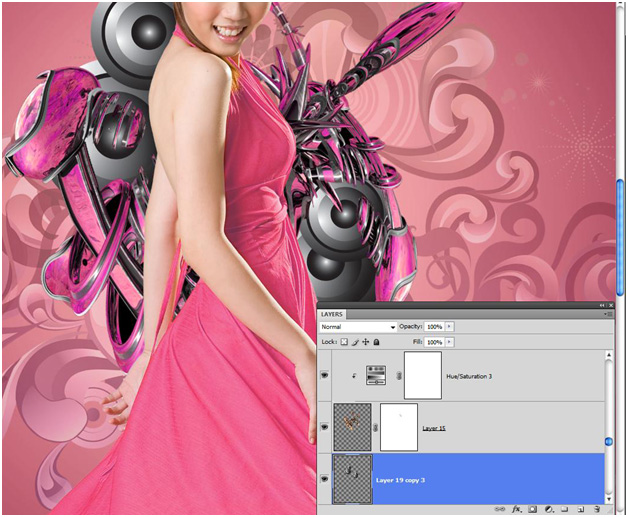
Step 9
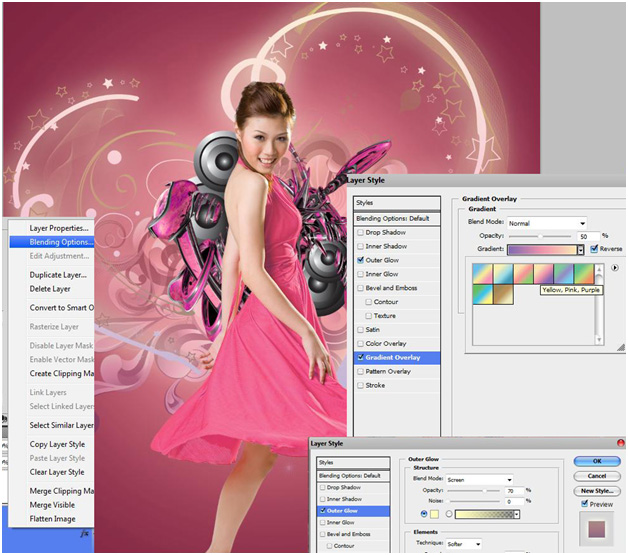
After we placed another vector design and put it behind the 3d render we place some big heart on the background as one of the main subject of a background aside from the first vector design background. Like the other two, it was also made in Illustrator using the brush tool. Modify it using the blending option and adjust the outer glow to change the opacity to about 70% and for the gradient overlay, I use the yellow, pink and purple. Check the reverse mode. and less en the opacity to about 50% and then click ok.
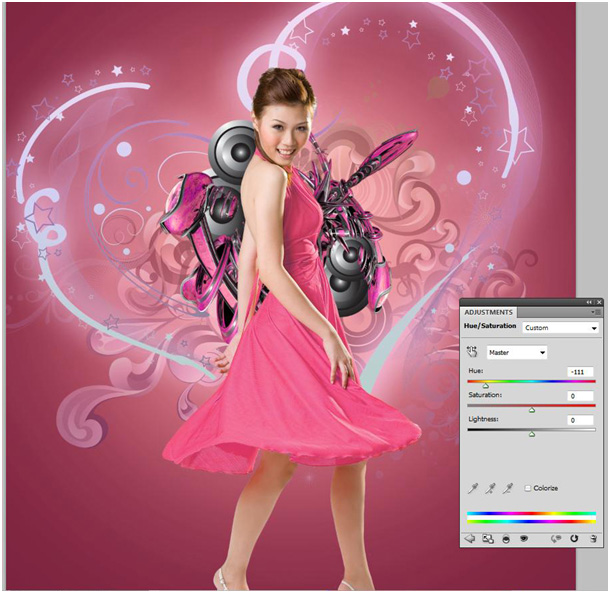
And now modify the hue and saturation to blend well with our composition.. and press ctrl+U and set this to -111
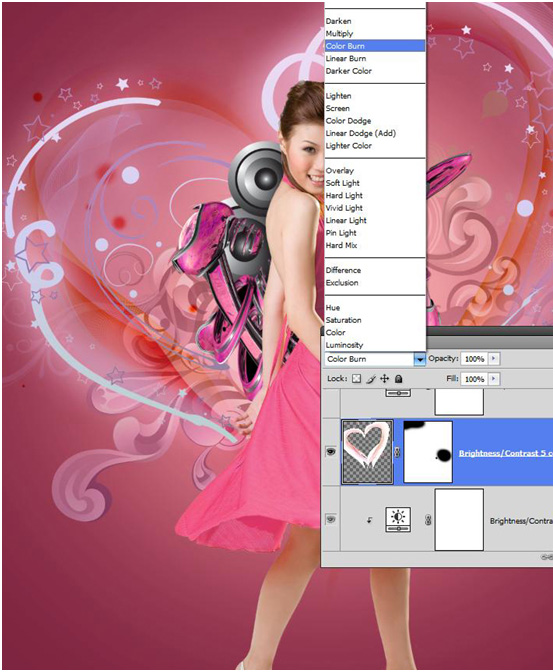
After that I also add another heart into it that I've made in Illustrator using the mesh tool to create some aura of a heart.
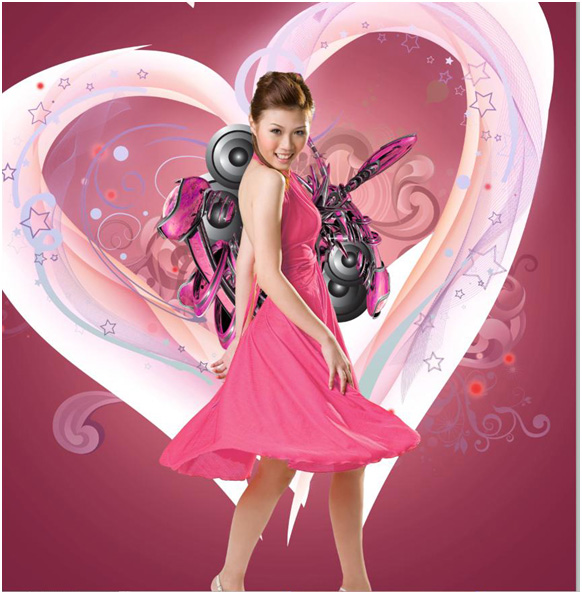
And then change the blending mode to color burn and mask the unwanted areas
Step 10
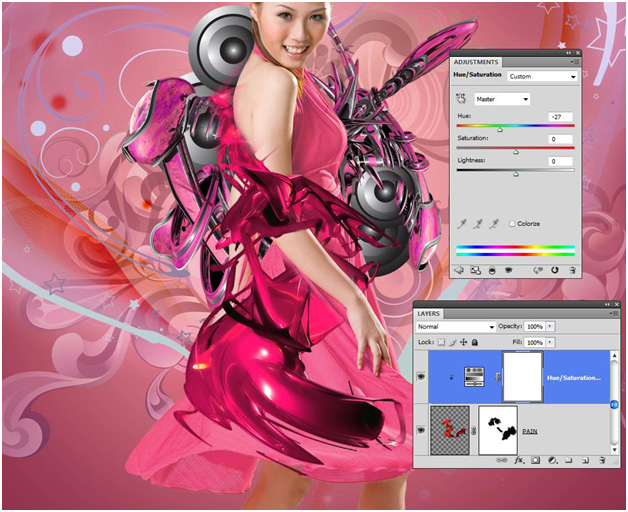
After we put in the big heart background and add some sort of aura into it we will be putting another 3d render made by argodream... But this time, we will blend it with her dress to look as it flows all around her. But first we need to mask it, to reveal on how the 3Drender will blend on the dress. And then press CTRL+U to modify its hue to -27
Step 11
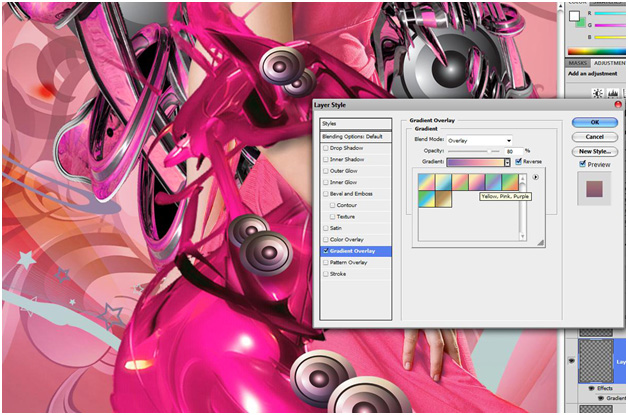
After we put in the 3d render to blend it with her dress. The next thing that we will do is adding some little speakers into it, like that we did before in the background... and select the blending option or a layer style and modify the gradient overlay by double clicking it, and change the blending mode to overlay and set the opacity to 80%
Step 12
After that we put all the little speakers into it... now for the effects, I'm going to use one of my customized brush that I've made, and place it where I want it to look like some kind of distortion happening to her.. For that you will need to select that layer wherein you put the brush and then hold down CTRL and press the thumbnail of that layer, in order for you to select the brush layer that you selected.
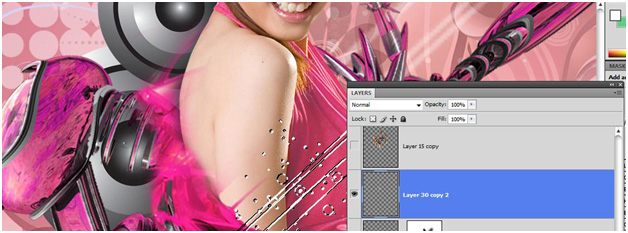
While the brush layer is selected, select the model layer and then press CTRL+J and a new layer will appear above the model layer. Now you can deselect the brush layer using the command CTRL+D that we've selected before and select the layer that appears above the model layer and resize it using the command CTRL+T to reveal the layer that we selected before
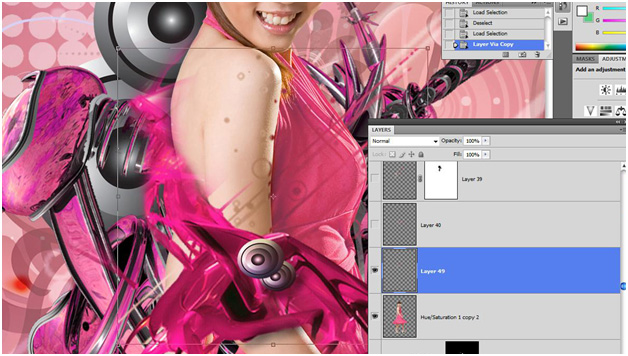
Repeat that process, and place the others to look like some kind of distortion happening to her
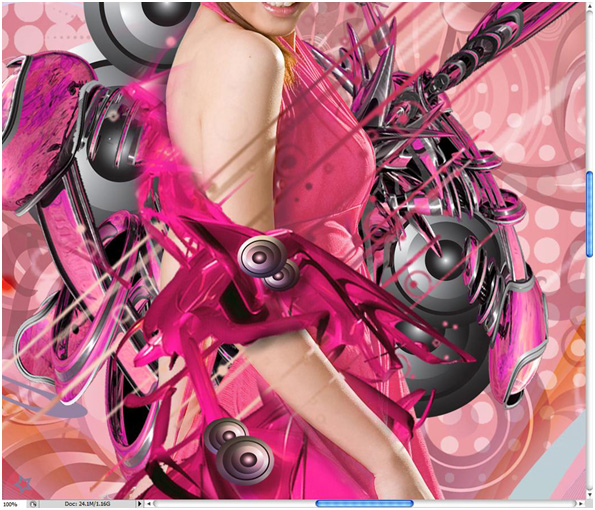
Step 13
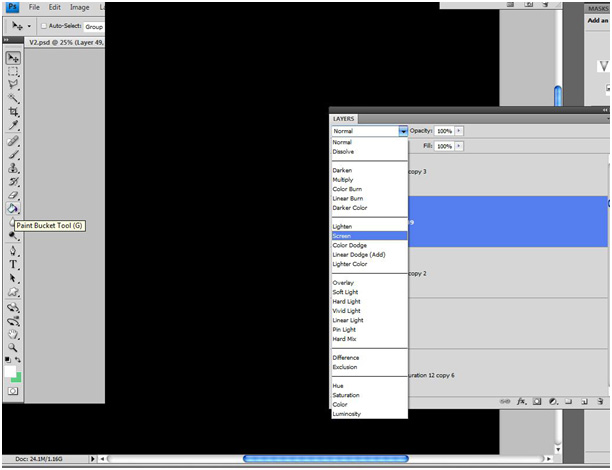
Now last thing that we will do is placing some lights using lens flare. To do that we need a new layer on the top of it and fill it with black color using the bucket tool and change the layer mode to the screen.
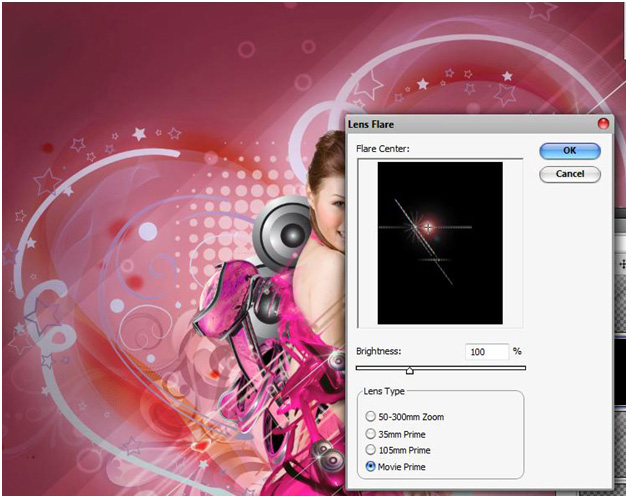
And go to Filter>Lens flare and choose movie prime. Repeat that process and place that will fit it most.
Step 14
After finishing this up you can also add more design into it like I did here. I also put some little heart design that I made in Illustrator here and added up some sparkles into it and I added up another texture design in the background aside from the first vector design that we put in earlier and placed some texture too from the flooring using the brush created by 'Go Media Arsenal brush set' that you can buy on their web sites.. but I think we've already created some really cool design here
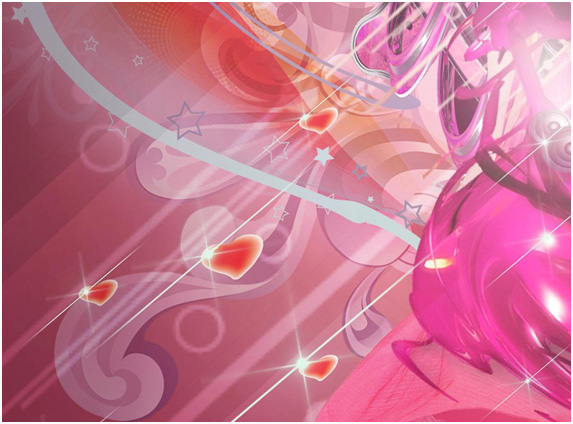
Final image..

Hope that this tutorial will be helpful.
Happy St. Valentine's Day!
Related Posts:
About the author
Copyright © . All Rights Reserved
