Adobe Photoshop Books:
- Adobe Photoshop CS6 Classroom in a Book
- Photoshop CS6: Visual QuickStart Guide
- Photoshop CS6 For Dummies
- Adobe Photoshop CS6 Digital Classroom
- Photoshop CS6: The Missing Manual
- The Adobe Photoshop CS6 Book for Digital Photographers
- Adobe Master Class: Photoshop Inspiring artwork and tutorials by established and emerging artists
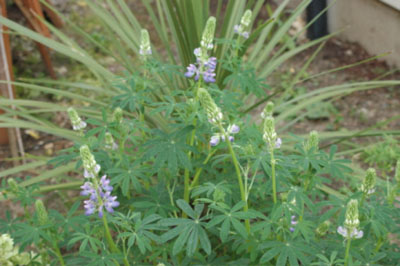
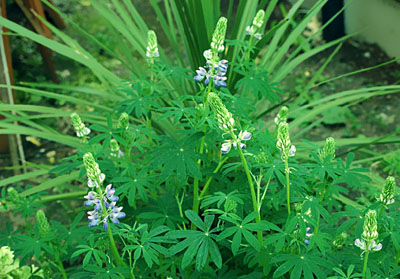
First, Select the picture that you want to make more clearly.
This is my picture, It's not good :
1. Before do anything, for safe, we create other layer by Press CTR + j to Duplicate Layer .
2. Use Filter -> Sharpen -> Unsharp Mask. In this step, we make a picture more clear.
With parameters:
Amount : 75 %
Radius: 1.5 pixels
Threshold: 0 levels
3. Next, we use Filter -> Blur -> Surface Blur. As follow:
Radius: 10 pixels
Threshold: 10 levels
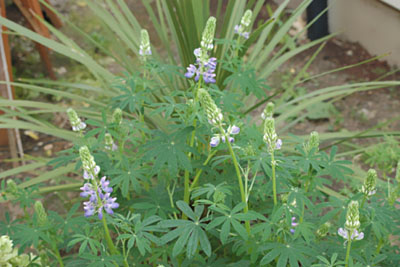
We have result of 3 steps above:
Then, we will use 4 tools of Image -> Adjustment: Brightness/Contrast , Color Balance , Levels and Curves.
4. Brightness/Contrast: with parameters
Brightness: -5
Contrast: +5
5. Color Balance:
Check Preserve Luminosity (if it is unchecked)
Select Shadows and set parameters into Color Levels: -25 | -5 | -7
Select Midtones and set parameters into Color Levels: -15 | +11 | -31
Select Highlights and set parameters into Color Levels: -5 | +5 | +5
6. Levels (or CTR + L)
Channels : RGB
Input Levels: 6 | 0.88 | 235
Out Levels: 0 | 255
7. Continue with Levels:
Channels : RGB
Input Levels: 0 | 1.00 |255
Out Levels: 0 | 245
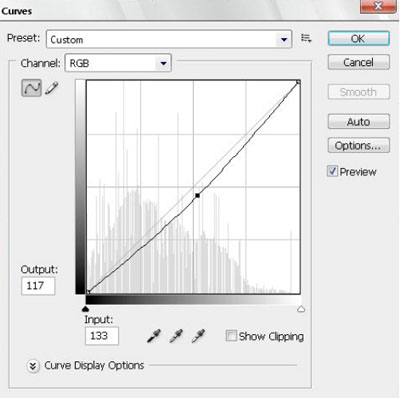
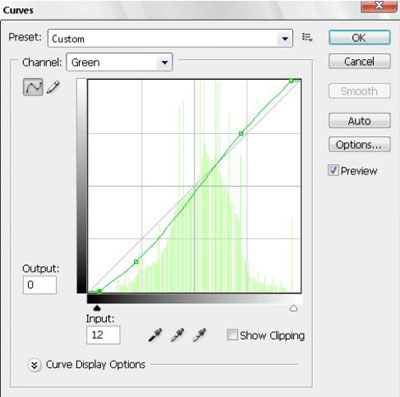
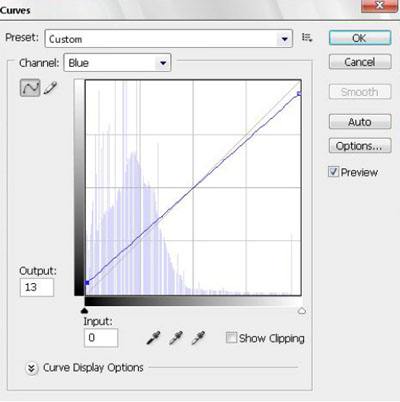
8. Curves: You set as figure :
First, with Channel: RGB
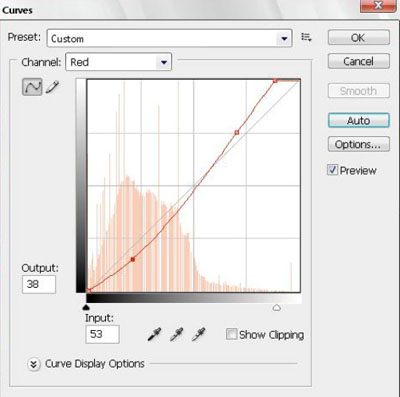
Channel: Red
Channel : Green
Channel : Blue
9. Final, we have a new picture
Related Posts:
- How to Create a Porcelain Skin Effect in Adobe Photshop CS6
- Pure an Energetic Photomanipulation
- Vintage Yourself! The Easiest Way to Create Vintage Photo Effect
- St Valentine's Day Photo Manipulation (Exclusive Tutorial)
- Night of Spells(Exclusive Tutorial)
- When the Dreams Come True(Exclusive Tutorial)
- Na vi avatar photo manipulation exclusive tutorial