When the Dreams Come True(Exclusive Tutorial)
We need the following photos:
Images: (thanks for using Your stock):
Model - download !!!
Background - download !!!
waterfall - download !!!
Wings - download !!!
Here we go...
- The Best Photoshop Actions Ever
- Photoshop tutorials
- Freebies: Round-up of 100 Free Textures
- 100 Free Patterns to Boost Your Creativity
- Adobe Photoshop CS6 Classroom in a Book
Step 1 - New Document
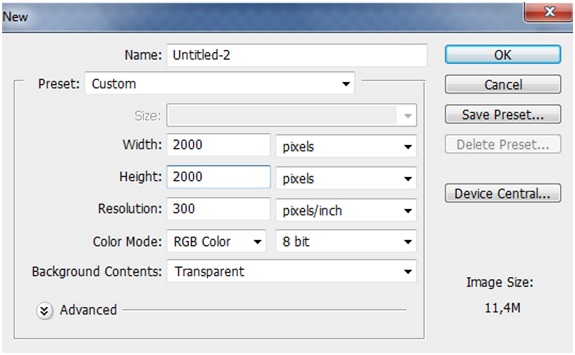
Start off by making a new canvas, 2000x2000 pixels. Set the values as in the photo below.
Step 2 - Background
At the beginning we are creating the background. Open the "Background.jpg" image and drag the stock background image to your canvas and make a new group for it Ctrl+G, rename this group to "background".
Now go to Edit> Free Transform. Fit image to your workspace.
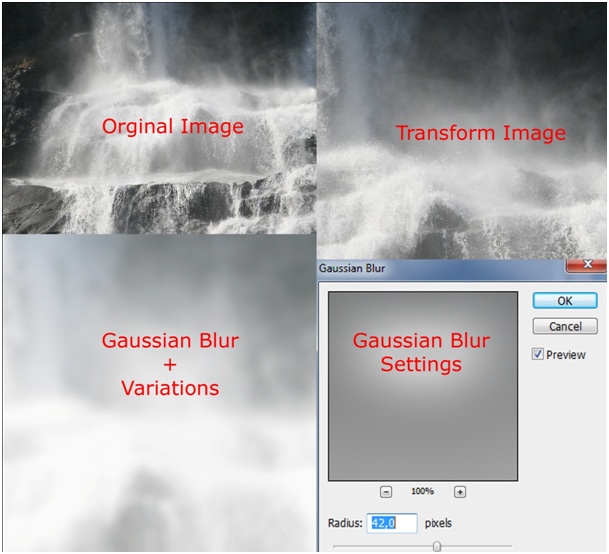
If you want to add a blur, go to Filter> Blur> Gaussian Blur.
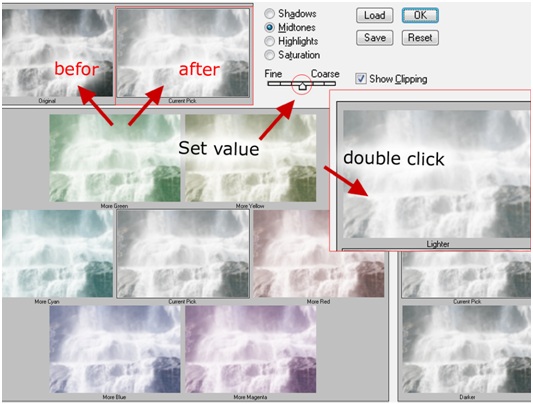
To brighten the background go to Image> Adjustments> Variations. If you want blur the background, go to: Filter>Blur>Gaussian Blur. You can see on illustration below...
Open up the Image menu Image>Adjustments>Shadow/Higlight... and apply follow settings:
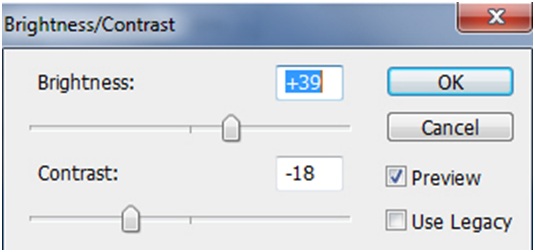
While the blurred layer is still selected, go to Image>Adjustments>Brightness / Contrast and reduce contrast, as well as adding brightness:
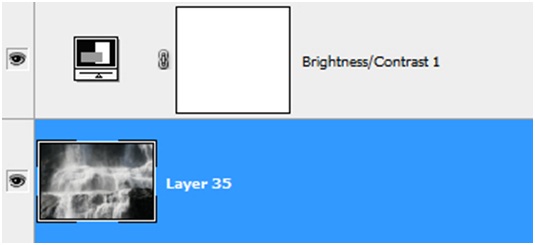
Step 3 - Selection models and retouching
Open the "model.jpg" image, drag to your canvas, make a new group for it Ctrl+G, name this group "model".
choose the Pen Tool (P ) and draw a path around the model's silhouette . in this way we'll extract the model from the background.
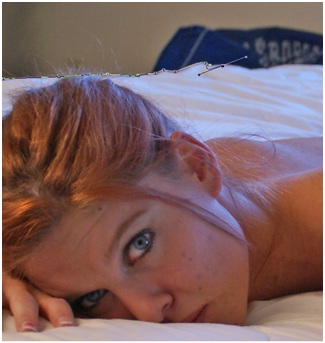
Click right on the path and choose Make Selection. Select Inverse Shift+Ctrl+I, and copy selected to new layer Ctrl+J, name this "Model".
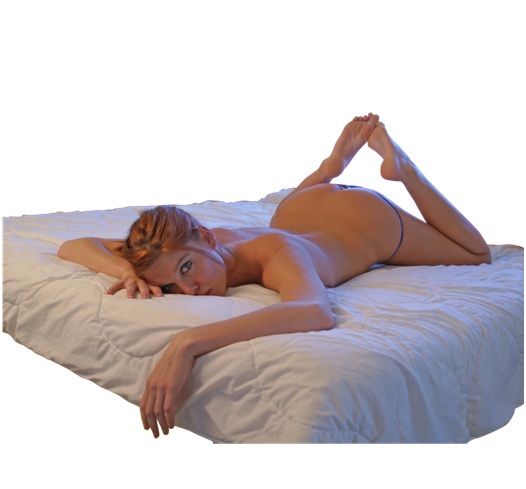
Copy the model layer (select the current layer, use the keyboard shortcut ctrl+J) then rename it to Model2, as in the step previously, extract the model completely from the background (remove the bed- now we can work directly on the model's)
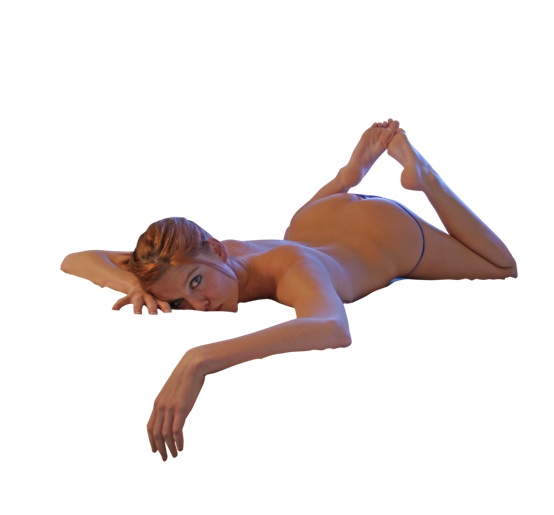
Step 4 - Shadow under the model
Take a hard brush, paint the black color the shadow under the model
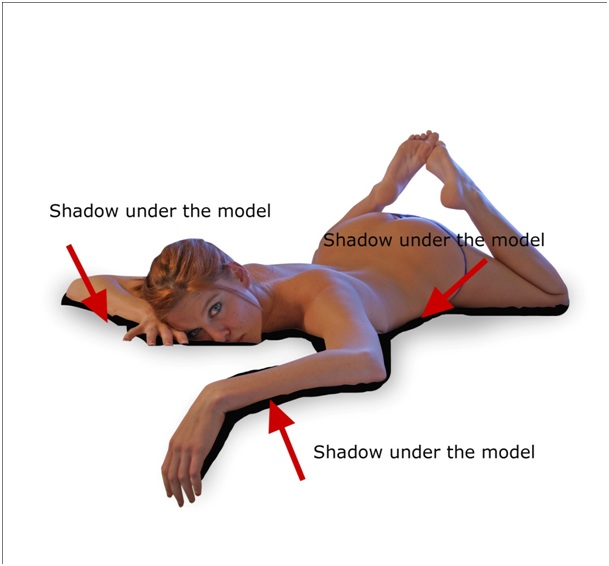
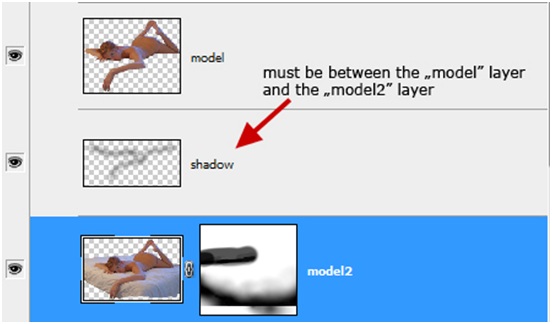
Important thing! the layer of shadow must be between the "model2" layer and "model" layer, like this:
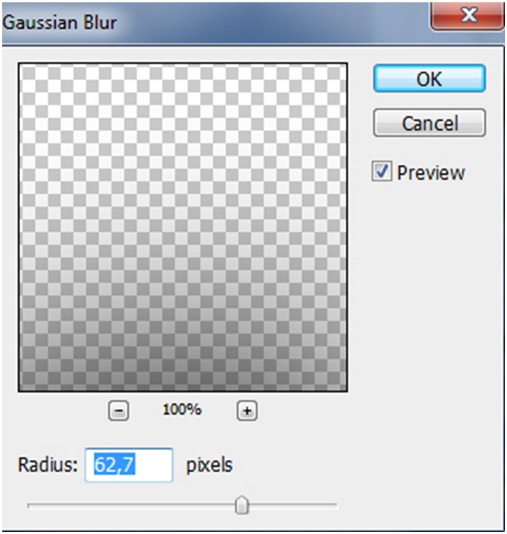
Go to Filter> Blur> Gaussian Blur, set the values as below:
change the Blending Mode to Multiply and fill at 73%
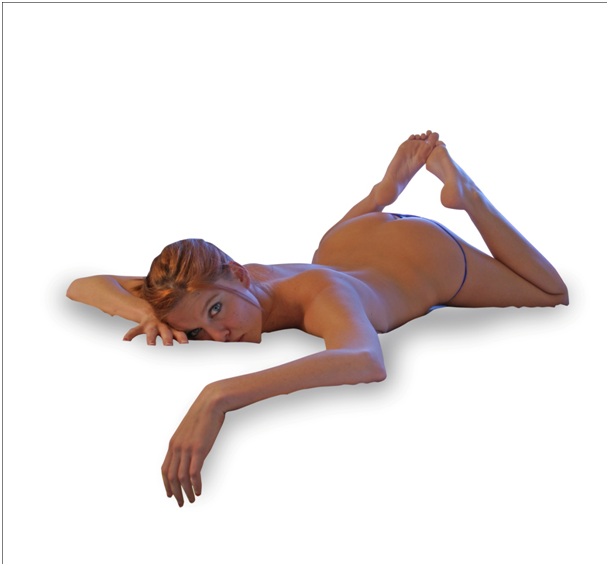
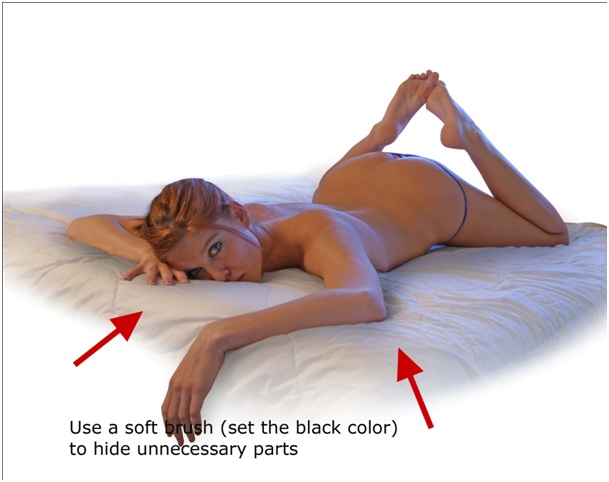
Next step is to add a layer mask to "model2" layer, set the white color, take a soft brush, set the black color and start hide unnecessary parts - (the edges of the beds), like this:
Step 5 - Hair
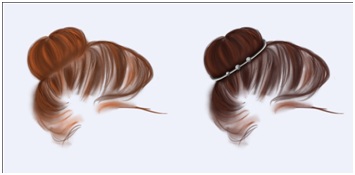
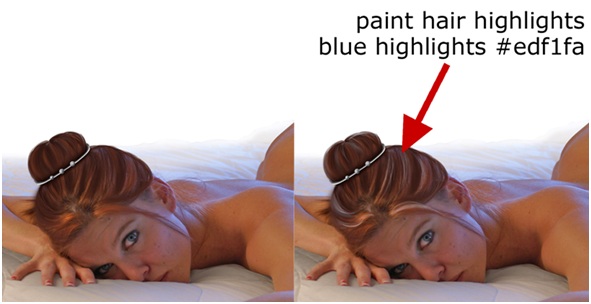
Now we can start painting hair. Use the following colors:
Grab Hard Brush (B), apply Shape Dynamics and Other Dynamics and use the following colors: #401d0e (shadow), #4e2a15 (midtones), #cf6227 (highlights).

Create new fill or adjustment layer and choose Levels
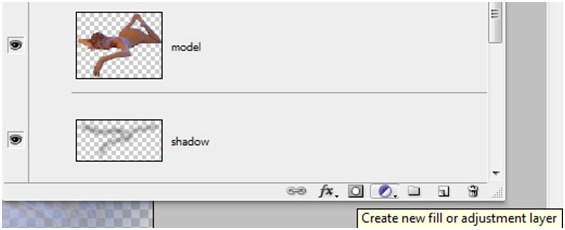
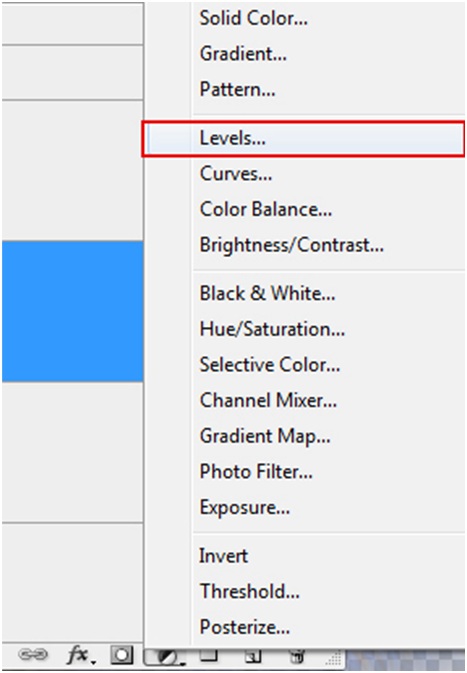
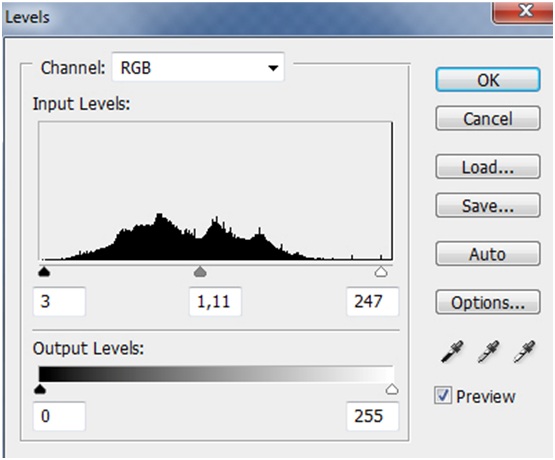
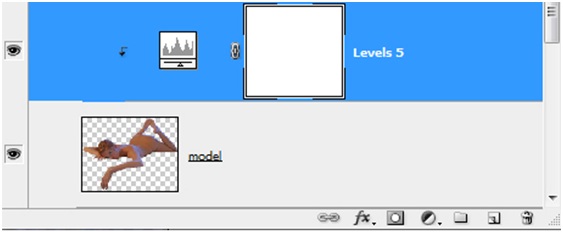
Make a Clipping Mask layer on top of this "model" layer.
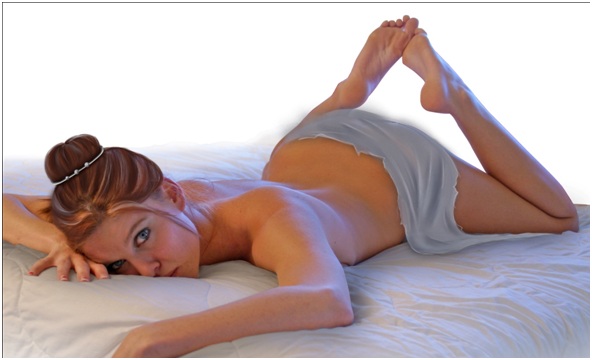
Step 6 - Veil
to painting veil - we need the following colors:
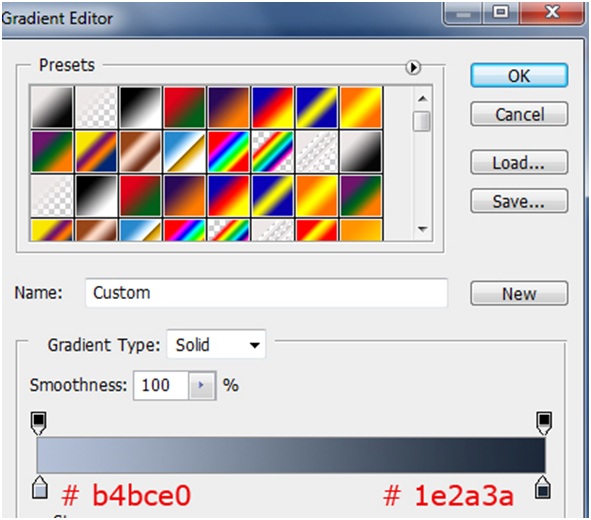
Midtones: # 7d8083, Highlights: # b4bce0, Shadow: #686a6c
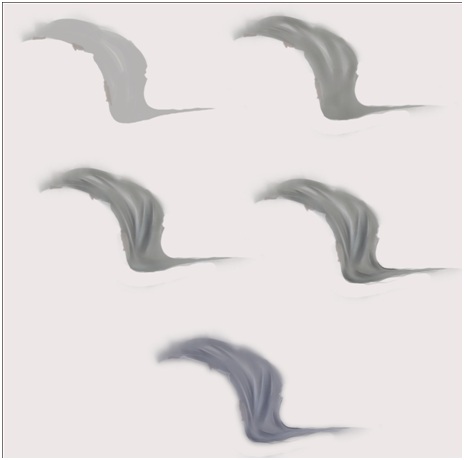
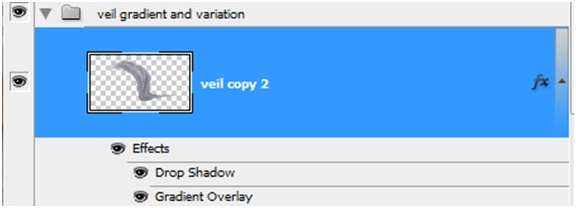
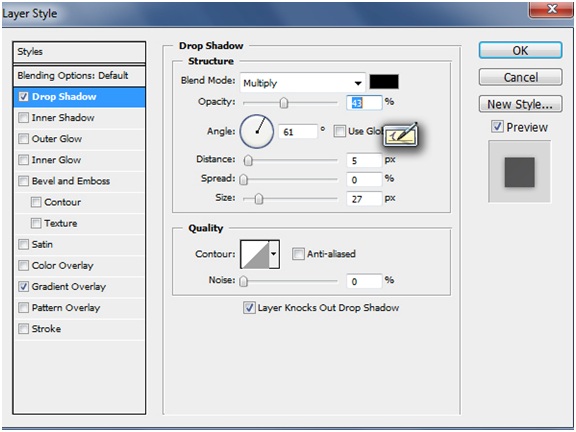
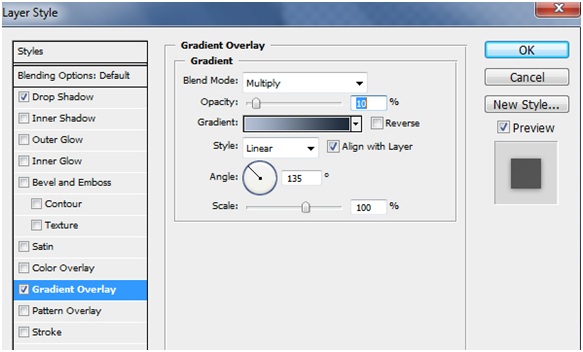
Now after painting veil on the model, I can start to add Gradient. Double click on the panel layer and choose Gradient, in this way i add some blue color in veil
Step 7 - Wings
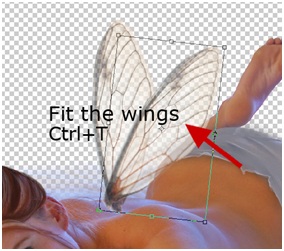
Extract wings from the background (use the Magic Wand Tool(W), set the Tolerance at 24% - 32%), move to your canvas, reduce the opacity to 73%. go to Edit> Free Transform (Ctrl + T), Fit the wings to the model
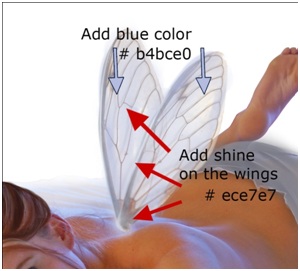
Add blue color and shine on the wings
Step 8 - Details on the hands
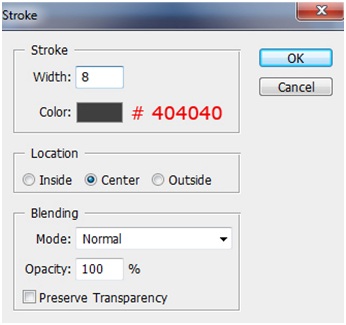
Take a Pen Tool, draw a shape similar as you can see on illustration below... Click right on the path and choose Make Selection. Select Inverse Shift+Ctrl+I, Press the keyboard shortcut (Shift+Ctrl+N) . in this way You create a new layer and go to: Edit>Stroke
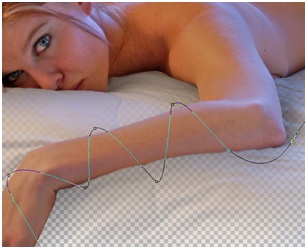
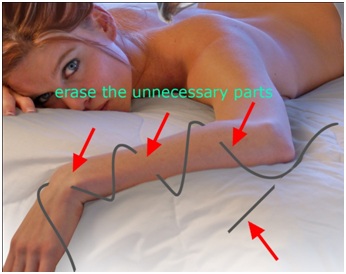
using the Eraser tool, erasing the unnecessary parts
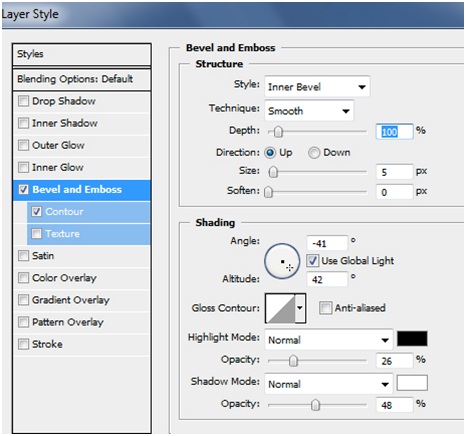
Click double on the layer panel and go to Bevel and Emboss, set the values as below:
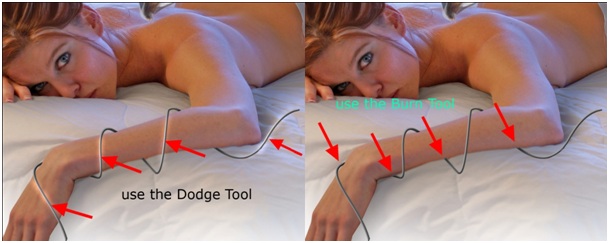
then using the Dodge Tool (O) and Burn Tool (O), creating dark and light areas near the hand model (see the picture below)
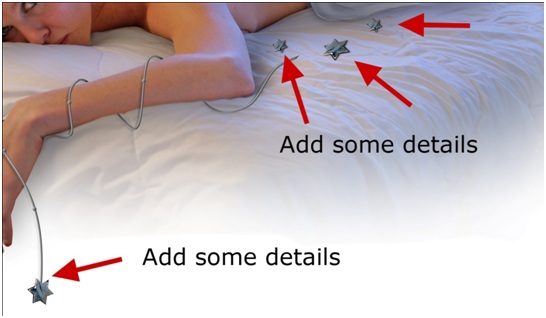
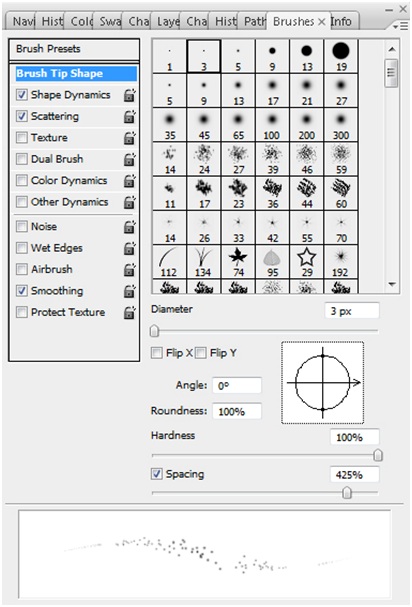
I'll now begin to add small details, I adding stars. it gives a dreamy atmosphere. The artwork should looks like in the picture below:
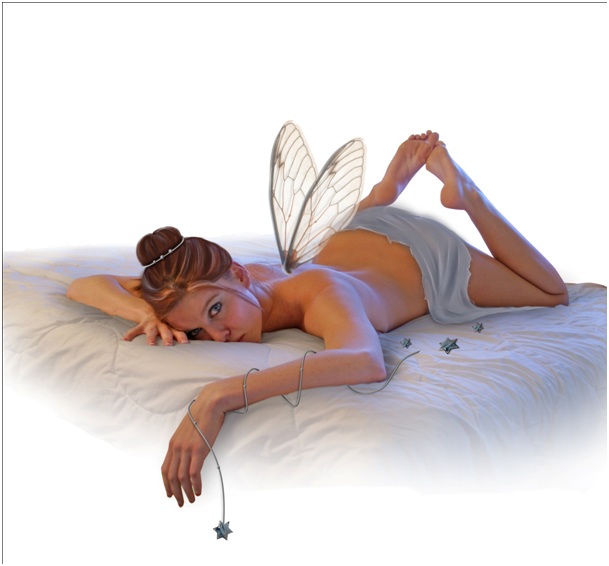
we have already a model and background. Artwork should looks similar to image below (background was creating in step 1)
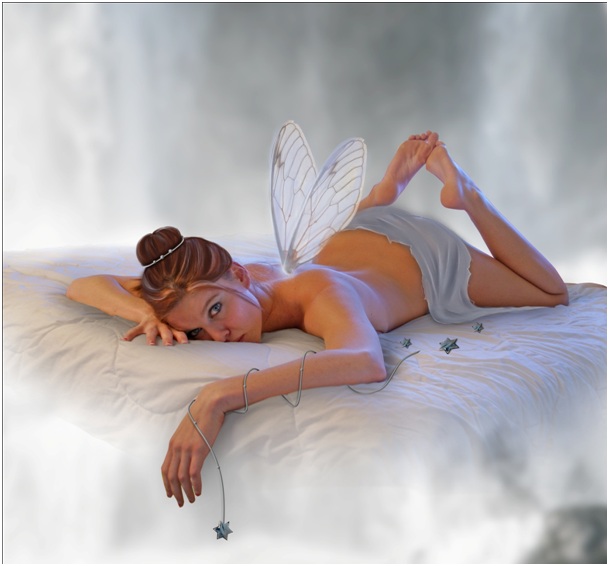
time for creating a waterfall
Step 9 - Waterfall
Open the "Waterfall" image and drag the stock image to your canvas and make a new group for it Ctrl+G, rename this group to "waterfall".
Important thing! "waterfall" group should be under the "model"group.

Then copy the current layer, rename it to "waterfall2" Now I have two layers with a waterfalls.
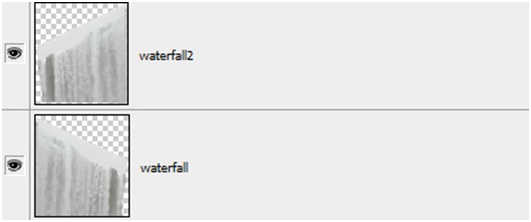
go to: Edit> Transform> Disort and fit the edge waterfall to the bed where there is a model
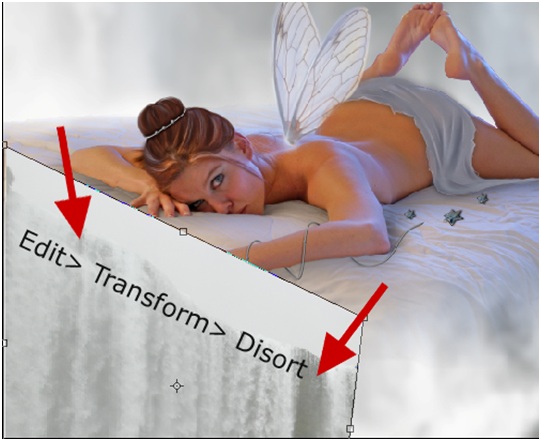
Select the "waterfall2" Layer and go to: Edit> Transform> Flip Horizontal
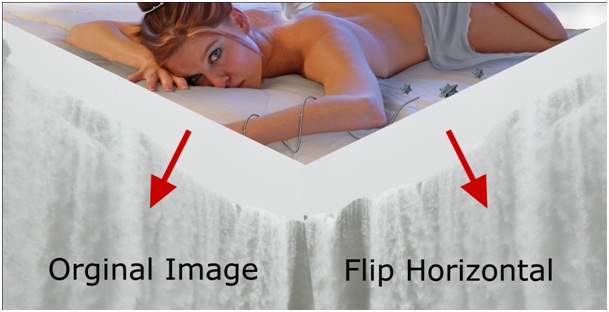
than Repeat step with the layer above(Edit> Transform> Disort)
Add a layer mask. remove unnecessary edges. Something like this:
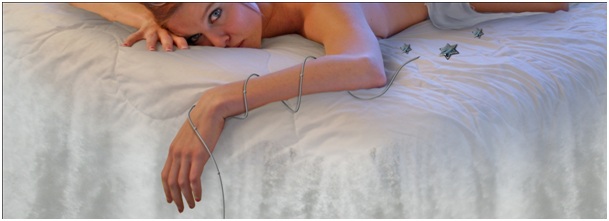
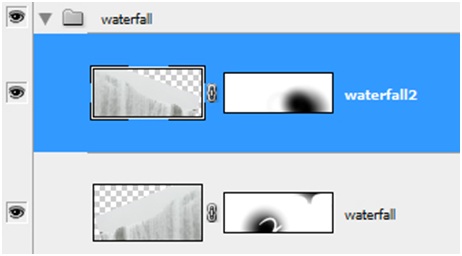
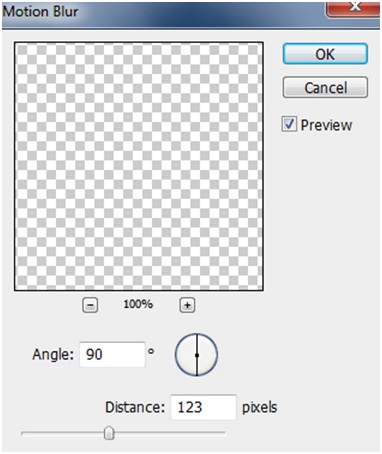
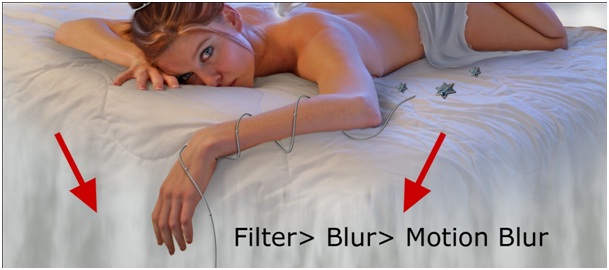
Go to: Filter> Blur> Motion Blur
Step 10 - Add Shadow and Highlights
Grab a Soft Brush, using the white color start painting the light
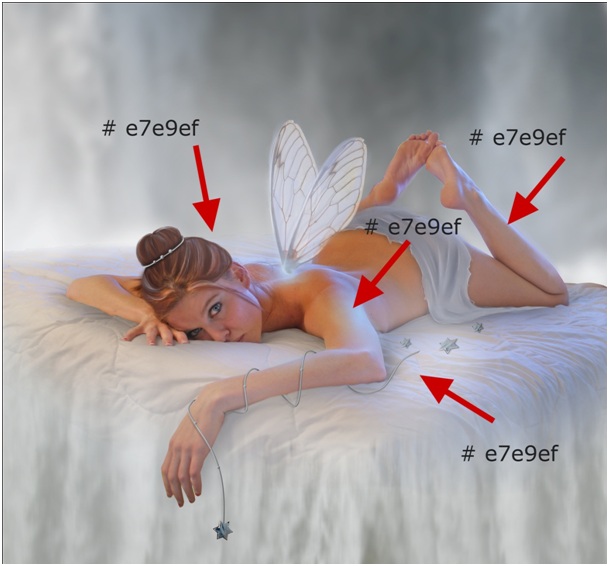
Now take a Soft Brush, with white color and paint the silver dust
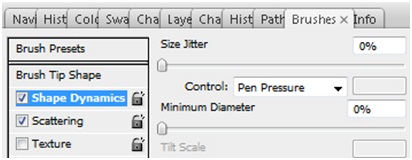
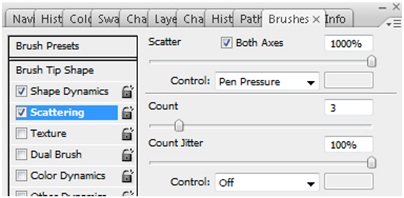
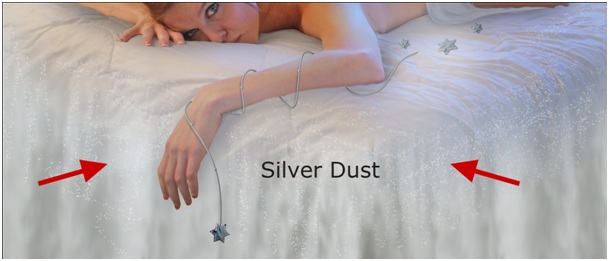
Step 11 - Final Artwork
Now You can start to adjust the artwork. The best way to do is to go to New Layer adjustmen and choose Selective Color, Black & White, Photo Filter, Gradient Fill, Brightness/Contrast and Leveles to colour your artwork.
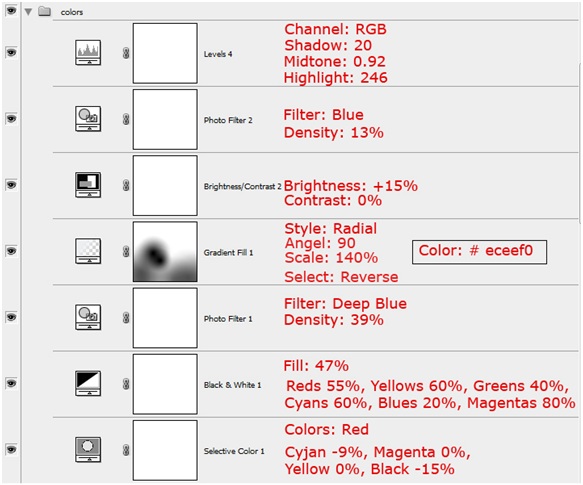
Your artwork should be similar like this:
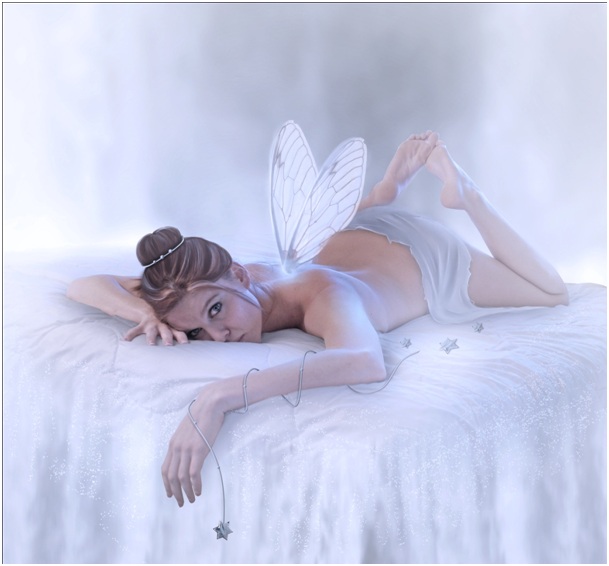
That's it. your manipulation is ready. hope you found this tutorial interesting. Thank you for reading.
Good luck !
Related Posts:
- How to Create a Porcelain Skin Effect in Adobe Photshop CS6
- Pure an Energetic Photomanipulation
- Vintage Yourself! The Easiest Way to Create Vintage Photo Effect
- St Valentine's Day Photo Manipulation (Exclusive Tutorial)
- Night of Spells(Exclusive Tutorial)
- Na vi avatar photo manipulation exclusive tutorial
About the author
Copyright © . All Rights Reserved
