Girl of My Dreams (Exclusive Tutorial)
- The Best Photoshop Actions Ever
- Photoshop tutorials
- Freebies: Round-up of 100 Free Textures
- 100 Free Patterns to Boost Your Creativity
- Adobe Photoshop CS6 Classroom in a Book
Step 1
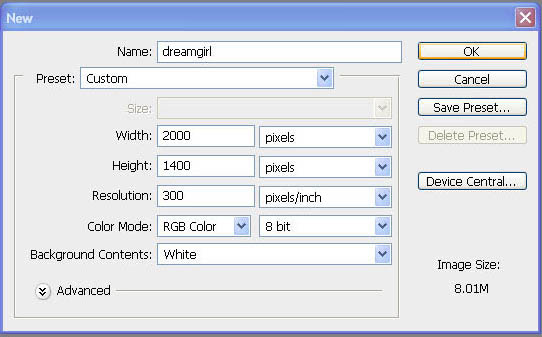
Open Photoshop, make a new document, I'm using 2000x1400 pixel dimension in this tutorial, just make your own dimension, keep the width have a greater size than the height.
Step 2
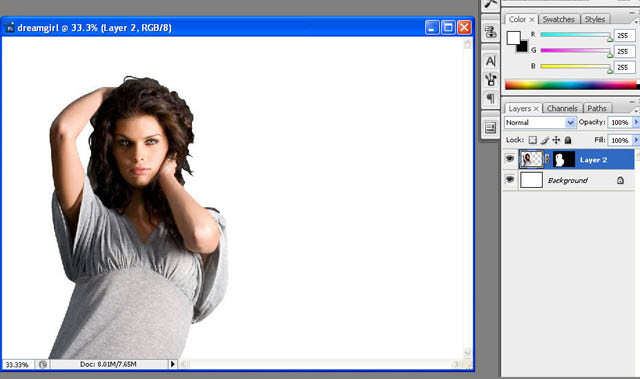
Open girl.jpg, try to isolate the girl using masking and place it into this new document.
Step 3
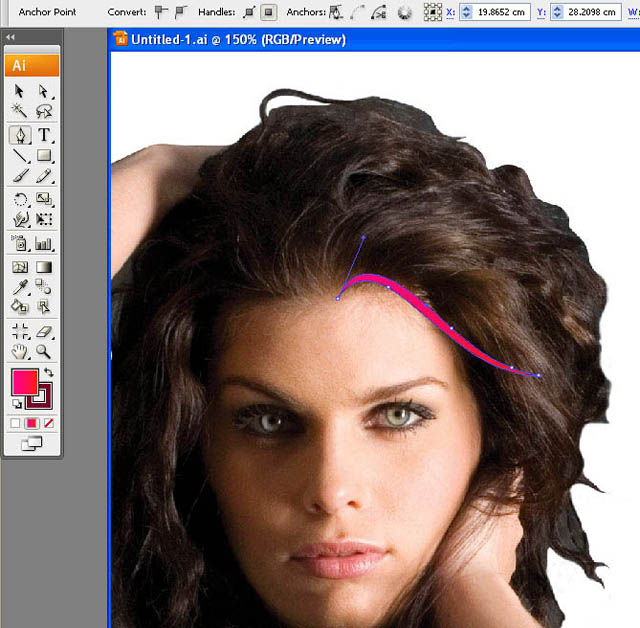
Close Photoshop, now we're changing to Illustrator. Make a new document and import the PSD file into. Then pick Pen Tool and let's make a shape, I'm both using color and stroke fill for the hair shape. You can create your own creation here. From this step we'll often using Pen Tool as a primary tool to make various shapes.
Step 4
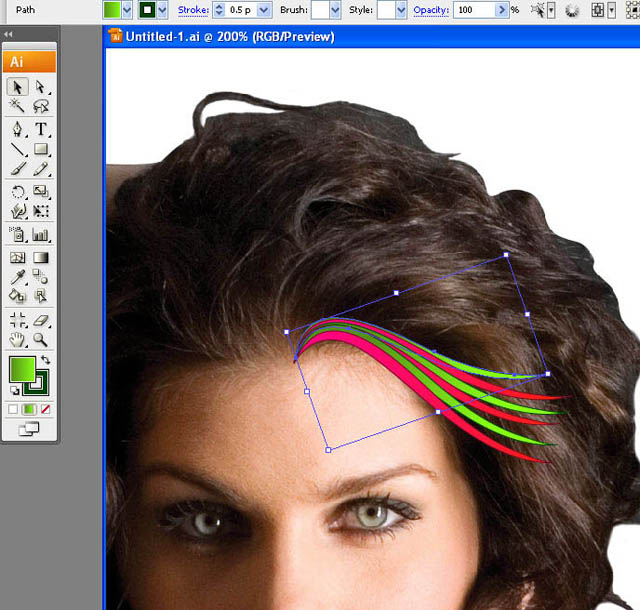
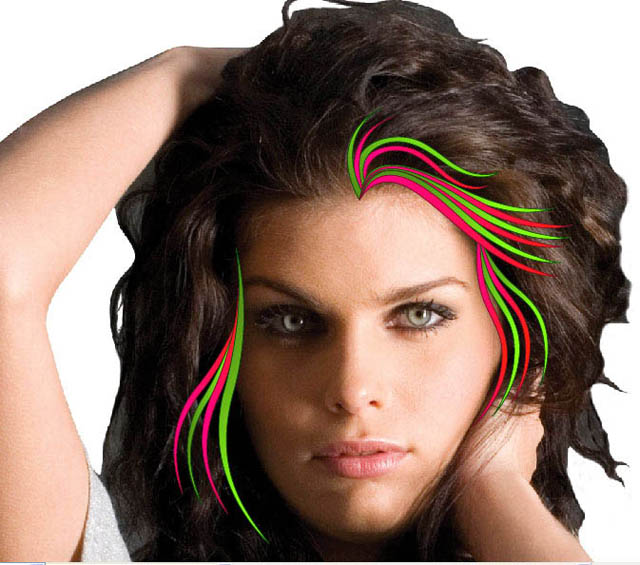
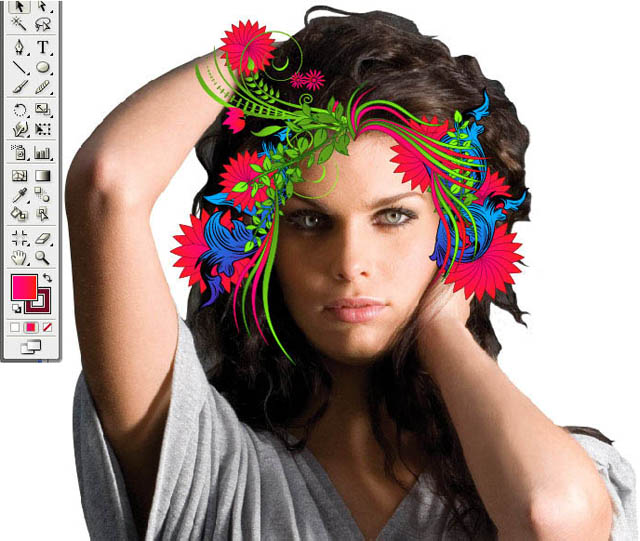
Duplicate the first shape and compose them like shown in the image. Rotate each shape continuously and try to apply various color and size.
Step 5
Add more shapes around her face, use Pen Tool to make some various shapes around.
Step 6
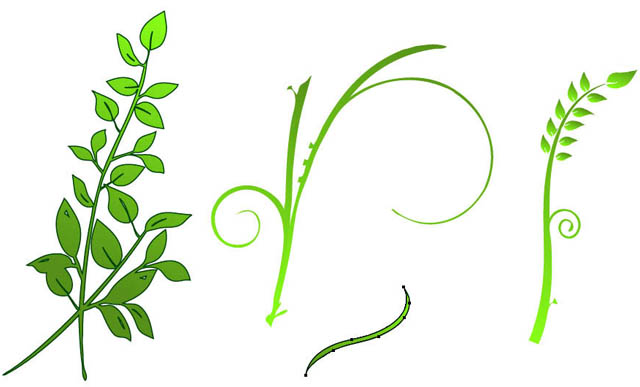
Next, we will make more complex shape, still using Pen Tool try to make some leaves and foliages. Just make your own creation, some references will help. We can combine and compose each element one another later.
Step 7
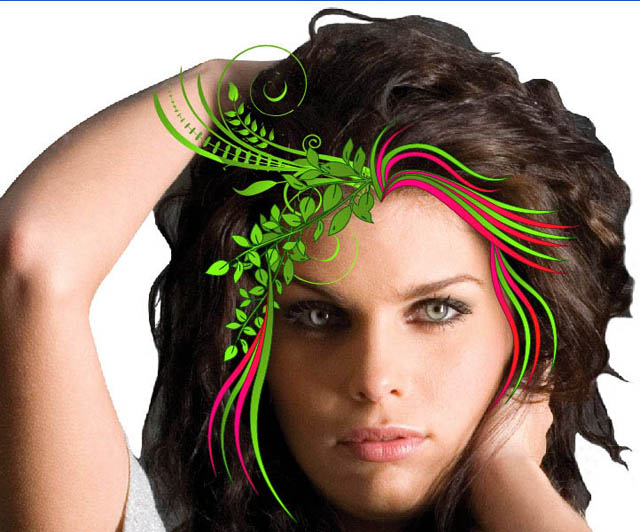
Place the leaves and foliages with the hair shapes. You can rotate, flip and compose each shape element one with another like show in the image.

Step 8
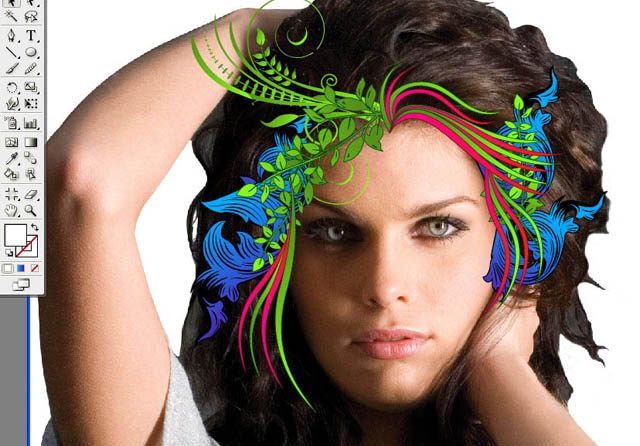
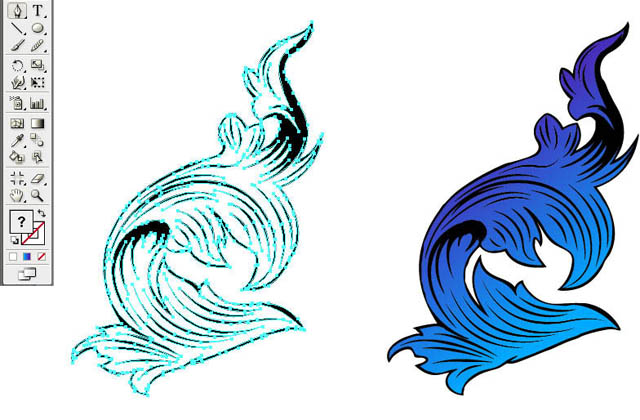
Next, try to make your own ornament shape. Firstly, create the lineart then go further with some details with various thin and thick lines. After that, fill the line art with color, I'm using bluish color here.
Step 9
Arrange the bluish ornament shape behind the other shapes. Try to rotate and flip to get different dimension.
Step 10
After some foliage shapes, let's try another creation using some flower shapes. First, make one flower petal using Pen Tool and then rotate and duplicate it continuously until we get a new flower shape. You also can make your flower shape using your own references. See image below for the flower shape process.
Step 11
Place your flower shapes and let's playing with composition, combine the flower with foliage shape. We also can use different color, I'm only using red color here.
Step 12
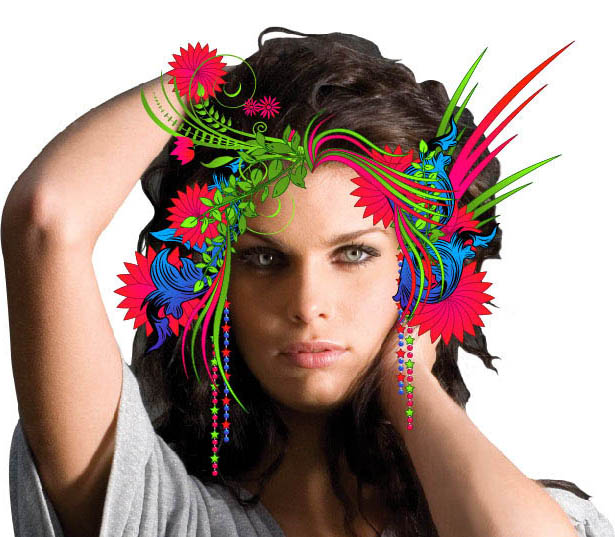
Use your imagination, we continue to add more details, more creative shapes. Maybe some accesories and feather shapes around her or try your own unique shapes.
Step 13
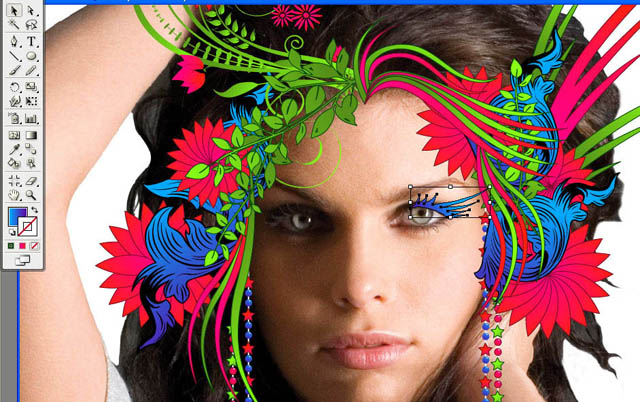
Make a new focus point on her eyelash, I'm make her eyelash bluish and bigger than its original size.
Step 14
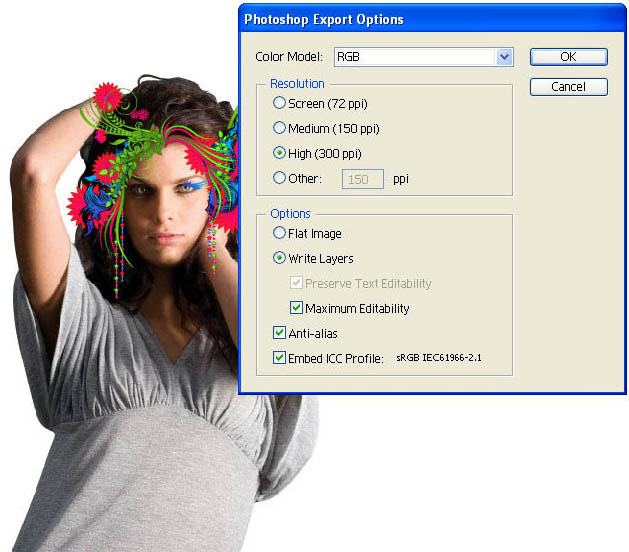
After done making all the shapes, go to File > Export, choose PSD file type and see image below. Choose High (300 ppi) resolution and make sure Write Layers selected and then select OK and close the program.
Step 15
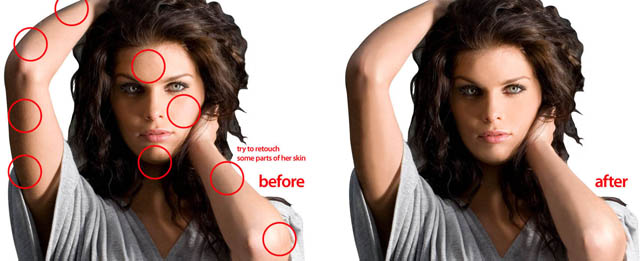
Now, back to Photoshop, reopen the first document, focus on the girl, make a new blank layer and start to retouch her skin using Brush tool. I'm using Airbrush with a big size and Opacity around 20-30%.
Step 16
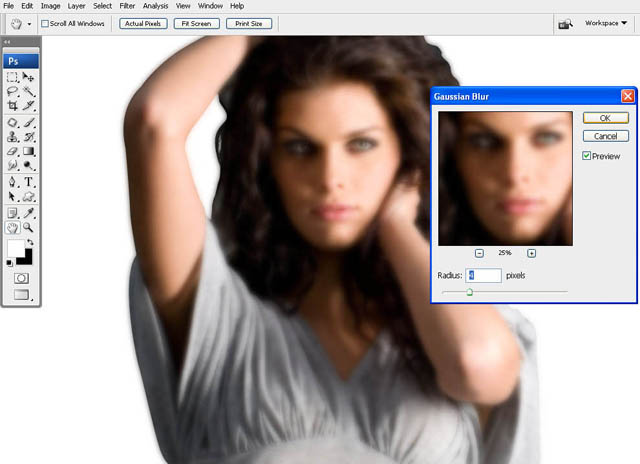
Next, duplicate the girl layer, merge it with the airbrush layer then choose Filter > Gaussian Blur with Radius: 4 pixels and change the layer mode into Soft Light. The lighting on the girl will become more contrast right now.
Step 17
Now open the exported PSD from Illustrator. Select all the shapes and drag them into the current working document, then close the exported PSD file, we aren't using this file anymore.
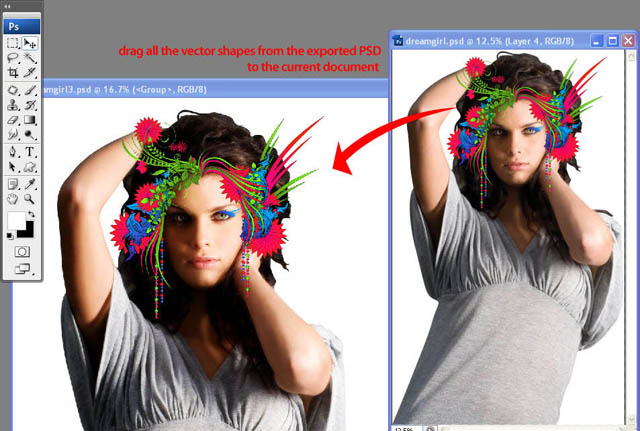
Step 18
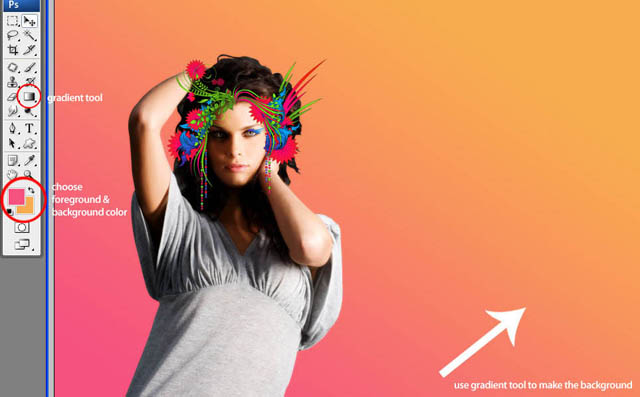
Choose Foreground and Background color and drag it using Gradient Tool, we're changing the white background into a colorful background. I'm using soft pink as foreground color and soft orange as background color.
Step 19
Let's play with colors, add more various colors to the background. Use Brush Tool with big size airbrush, set the Opacity: 85% and Flow: 100%, pick some soft colors such as soft blue, cyan, soft purple and soft yellow.
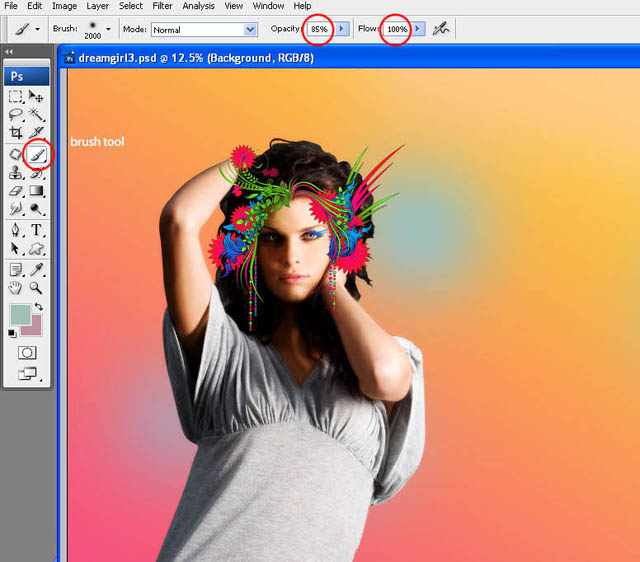
Step 20
Open the bonsai.jpg (got from Shutterstock: 10004410) or just use your own tree stock. Erase the background using masking and adjust the color using Hue/Saturation. I change the color from green become magenta.
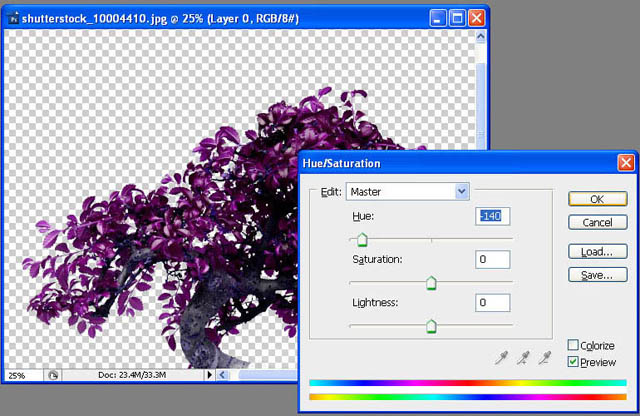
Step 21
Then, place and compose the bonsai tree with the other shapes, in the left and right side below the others like shown in the image. You can duplicate, flip or rotate the bonsai tree depends on your creation.
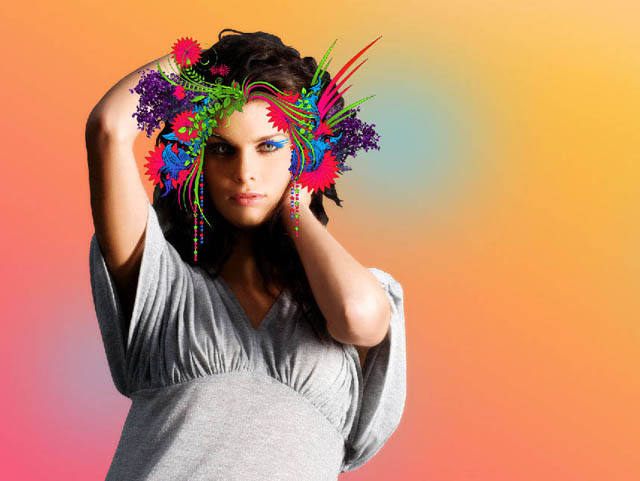
Step 22
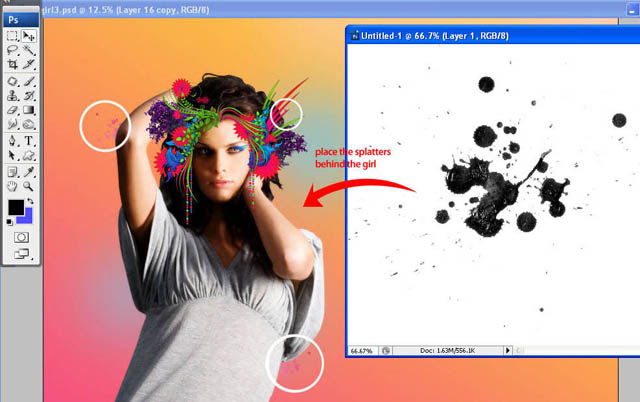
We will add grunge details around the girl, open splatter.jpg, make selection of the blood splatters and place them behind the girl.
Related Posts:
- How to Create a Porcelain Skin Effect in Adobe Photshop CS6
- Pure an Energetic Photomanipulation
- Vintage Yourself! The Easiest Way to Create Vintage Photo Effect
- St Valentine's Day Photo Manipulation (Exclusive Tutorial)
- Night of Spells(Exclusive Tutorial)
- When the Dreams Come True(Exclusive Tutorial)
- Na vi avatar photo manipulation exclusive tutorial
About the author
Copyright © . All Rights Reserved
