Photo Manipulation - "Surreal Bubbles" (Exclusive Tutorial)
Introduction
Hi, my name is Berthjan Achterop (www.berthjan.com | www.sterkhouders.nl) and I really like graphic design & art. I often get questions about photomanipulation and how I work. In this tutorial i will show you a technique how to create surreal bubbles & items and realistic reflections on the water. I have used this technique in quite some work. You can see this technique on the image below. In this tutorial i will show you how you can achieve this effect. So i hope you will enjoy and learn from this tutorial. If you have questions or comments you can always add me on twitter (www.twitter.com/berthjan), I am always willing to help! Hope you guys have fun!
- The Best Photoshop Actions Ever
- Photoshop tutorials
- Freebies: Round-up of 100 Free Textures
- 100 Free Patterns to Boost Your Creativity
- Adobe Photoshop CS6 Classroom in a Book
You can download the photos here:
lake photo
star photo
Step 1:
Make a new canvas, with the following settings and press “OK”:

Step 2:
Open the file “Lake.jpg” (image 1) in your new canvas. Call the layer “Background” (image 2). This will be the background of your scenery.

Step 3:
Now we will adjust the background and make the colours a bit more surreal. We use the Hue/ Saturation tool to accomplish this. Press CTR-U to get the Hue/ Saturation panel (image 1). Now change the values as seen on the image below (image 2).


Step 4:
Next we will add some contrast to the background to make the colours stronger and more surreal. We can adjust the contrast by using the Levels panel. Press CTR-L to get the panel (image 1). Change the values as shown on image 2.


Step 5:
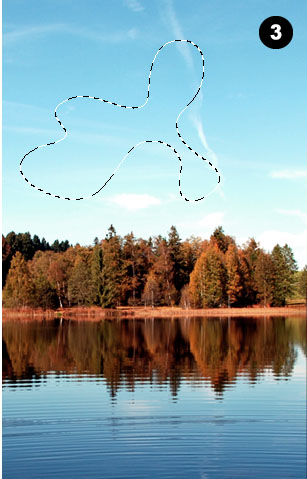
It’s time to start making a nice bubble! We create a new Layer which we will call “Bubble”(image 1). This is the layer where we will make our bubble in. We will draw the bubble by using the Pentool(P)(image 2). Use the pentool settings like shown on image 3. It’s important that your pendrawing will create a path so we can make an easy selection later on. Now draw a nice shape like image 4. Feel free to make another shape if you like!

Step 6:
At this moment we want to make a selection out of the drawn anchorpoints path (image 1). We can make a selection by opening the Paths panel and right-mouse click on the bubble path (image 1). Choose “Make selection”. A “Make selection” pop-up will appear (image 2). Press “OK”. Now we have a nice selection of the bubble shape (image 3).

Step 7:
With our brand new selection we can really create our bubble! All we have to do is use a soft brush with a low opacity and a 50% flow. Use the brush (B)(image 1) and use the settings as shown below (image 2).

Step 8:
Brush very gentle around the borders of the selection (image 1). If you want to have more contrast while brushing, you can create a new layer (optional) which we call “temp black layer” (image 2). Look where the light is coming from and create highlights with your brush. You should get something like the image below (image 2).

Step 9:
At this moment we have our bubble (it is still a selection). But it needs some colours. So we make an new layer ( image 1) and we name it “Colours”. We will set the blending mode to “Color”. Now we use the Brushtool(B)(image 2) again and give colours to the selection. Use the same brush as in Step 7. Brush very gentle and use bright colours like image 3.

Step 10:
Our bubble is now finished but we still need a realistic reflection of the bubble in the water. We will accomplish this by copying the “bubble” folder (image 1). We call the folder “Bubble copy”. We want to merge the folder because we are going to use some nice tools on the bubble reflection, which we can’t use if the layer remains a folder. Press right-mouse click on the “bubble copy” folder and press Merge group (2). Now our “bubble copy” folder is a layer! It’s time to finish the reflection!


Step 11:
We need to flip the reflection Vertical, so while selecting the “bubble copy” layer we press CTR-T to use the “Free transform” tool. Now we press right-mouse click and choose “Flip Vertical”. (1) If you do this right you will get a likewise result as image 2


Step 12:
Our reflection is flipped but it still looks a bit flat and fake. So we are going erase the outer parts of the reflection. We do not want to delete the layer information so we use a mask on the “bubble copy” layer (image 1). While selecting the mask layer we are using the same brush(B) as described in step 7. The brush has to be black as we are going to erase some of the layer information by using a mask (image 2). Now gently erase the outer corners of the reflection (image 3 & 4).


Step 13:
The reflection looks much better right now but we still need to make it more realistic. Adding some wrinkles would definately be a great adjustment. We can easliy create the wrinkle effect by using the “Smudge” tool (image 1). We need the settings to be as shown on image 2. Now select the “bubble copy” layer (not the mask) and start to smudge!

Step 14:
While smudging try to smudge along with the flow of the water wrinkles. Use different brushsizes with [ and ] to accomplish the desired effect. You should get something like image 1.

When you are satisfied with the results, order your layers again. Put the reflection layer “bubble copy” in the folder “bubble” (image 2).
Step 15:
Repeat the process and make a lot more bubbles. You can make every shape you want.

Step 16:
Now that we've created a few bubbles we are going to add some colour to the scene. Here's how we're going to do it.
Create a new layer named “Colour” on top of the “bubbles” layer (image 1). The colour layer should have a “Multiply” Blending mode. Use the same colouring technique as we used in step 9 to create some more atmoshpere.
Bubbles are nice but coloured objects are great as well. So we will add a new object to the scene. Open the picture “Star.jpeg” (image 1 &2) and add it to your canvas (image 2) on a new layer named “Star” (image 1).

Step 17:
We will use the same technique as in step 5 to make a selection of the star. Use the Pentool (P)(image 1), make a path (image 2), make a selection of the path (image 4), Make sure the “Star” Layer is selected. now invert the selection by pressing CTR-SHIFT-i(image 3). Press DEL to delete the white part of the layer. Press CTR-T to scale en reposition the layer (image 5). You can put the star anywhere you like.

Step 18:
To create a nice reflection you can use the same technique as step 11-14. When you're done, order your layers in a map (image 1).

Step 19:
Add another layer and name it “Overall colour”. Use a “multiply” and add some color to the scene to make it more surreal. Use the same technique as Step 9. You can add as much elements you like and finish the piece!

Step 20:
In this tutorial i showed you how to use this technique on simple objects.
I used this technique a lot in the following work.

Related Posts:
- How to Create a Porcelain Skin Effect in Adobe Photshop CS6
- Pure an Energetic Photomanipulation
- Vintage Yourself! The Easiest Way to Create Vintage Photo Effect
- St Valentine's Day Photo Manipulation (Exclusive Tutorial)
- Night of Spells(Exclusive Tutorial)
- When the Dreams Come True(Exclusive Tutorial)
- Na vi avatar photo manipulation exclusive tutorial
About the author

Copyright © . All Rights Reserved